Welcome to the DFO World Wiki. With many major updates since the release of DFO, many items are missing. Visit Item Database Project to learn more.
Please remember to click "show preview" before saving the page.
Thanks for the updated logo snafuPop!
Difference between revisions of "Category:Automated Player Character family"
m |
(Updated Icon) |
||
| (21 intermediate revisions by 9 users not shown) | |||
| Line 1: | Line 1: | ||
| + | {{MissingInfo|Page layout and data is outdated. Refer to individual APC pages.}} | ||
Enemies that resemble playable classes. The simplest versions will spam only one skills while the more advanced enemies will possess combos. | Enemies that resemble playable classes. The simplest versions will spam only one skills while the more advanced enemies will possess combos. | ||
{| class="wikitable" style="text-align:center; width:70%;" | {| class="wikitable" style="text-align:center; width:70%;" | ||
|- | |- | ||
| − | ! colspan="3" style="background:#a0c6e3;" | [[Image:Icon Nemesis.jpg|28px|left]] Kuran's Nemesis Jahilde ([[Asura]]) | + | ! colspan="3" style="background:#a0c6e3;" | [[Image:Icon Nemesis.jpg|28px|left]] [[Kuran's Nemesis Jahilde]] ([[Asura]]) |
|- | |- | ||
| align="center" rowspan="2" | [[Image:Nemesis Jahilde.jpg]] | | align="center" rowspan="2" | [[Image:Nemesis Jahilde.jpg]] | ||
| Line 16: | Line 17: | ||
|- | |- | ||
| − | ! colspan="3" style="background:#a0c6e3;" | [[Image:Icon Lotus Puppet.jpg|28px|left]] Lotus's Puppet ([[Crusader]]) | + | ! colspan="3" style="background:#a0c6e3;" | [[Image:Icon Lotus Puppet.jpg|28px|left]] [[Lotus's Puppet]] ([[Crusader]]) |
|- | |- | ||
| align="center" rowspan="2" | [[Image:Lotus Puppet.jpg]] | | align="center" rowspan="2" | [[Image:Lotus Puppet.jpg]] | ||
| Line 29: | Line 30: | ||
|- | |- | ||
| − | ! colspan="3" style="background:#a0c6e3;" |[[Image:Icon Treasure Hunter Jakarta.jpg|28px|left]] Treasure Hunter Jakarta ([[Brawler]]) | + | ! colspan="3" style="background:#a0c6e3;" |[[Image:Icon Treasure Hunter Jakarta.jpg|28px|left]] [[Treasure Hunter Jakarta]] ([[Brawler]]) |
|- | |- | ||
| − | | align="center" rowspan="2" | [[Image: | + | | align="center" rowspan="2" | [[Image:THJakarta.png]] |
! Location | ! Location | ||
|- | |- | ||
| Line 42: | Line 43: | ||
|- | |- | ||
| − | ! colspan="3" style="background:#a0c6e3;" |[[Image:Icon Empyrean Wanderer Magney.jpg|28px|left]] Empyrean Wanderer Magney ([[ | + | ! colspan="3" style="background:#a0c6e3;" |[[Image:Icon Empyrean Wanderer Magney.jpg|28px|left]] [[Empyrean Wanderer Magney]] ([[Mechanic]]) |
|- | |- | ||
| − | | align="center" rowspan="2" | [[Image:Empyrean Wanderer Magney. | + | | align="center" rowspan="2" | [[Image:Empyrean Wanderer Magney sprite.png]] |
! Location | ! Location | ||
|- | |- | ||
| − | | [[Second Spine]]: Room D1 | + | | [[Second Spine]]: Will always spawn in Room D1, and has a chance of spawning in room C1 and B1 |
[[File:Map Second Spine.JPG]] | [[File:Map Second Spine.JPG]] | ||
|- | |- | ||
! colspan="3" | Notes | ! colspan="3" | Notes | ||
|- | |- | ||
| − | | colspan="3" | Uses [[BBQ]] and summons [[RX-78 Land Runner]]s | + | | colspan="3" | Uses [[BBQ]] and summons [[RX-78 Land Runner]]s and [[Ez-8 Time Bomb]]s. The intelligence quest requires you to defeat him in room C1. |
|- | |- | ||
| − | ! colspan="3" style="background:#a0c6e3;" |[[Image:Icon GBL Library Cleaner.jpg|28px|left]] GBL Library Cleaner ([[Witch]]) | + | ! colspan="3" style="background:#a0c6e3;" |[[Image:Icon GBL Library Cleaner.jpg|28px|left]] [[GBL Library Cleaner]] ([[Witch]]) |
|- | |- | ||
| align="center" rowspan="2" | [[Image:GBL Library Cleaner.jpg]] | | align="center" rowspan="2" | [[Image:GBL Library Cleaner.jpg]] | ||
| Line 68: | Line 69: | ||
|- | |- | ||
| − | ! colspan="3" style="background:#a0c6e3;" |[[Image:Icon Frostbite Xile.jpg|28px|left]] Frostbite Xile ([[Gunner]]) | + | ! colspan="3" style="background:#a0c6e3;" |[[Image:Icon Frostbite Xile.jpg|28px|left]] [[Frostbite Xile]] ([[Gunner]]) |
|- | |- | ||
| − | | align="center" rowspan="2" | [[Image:Frostbite Xile. | + | | align="center" rowspan="2" | [[Image:Frostbite Xile sprite.png]] |
! Location | ! Location | ||
|- | |- | ||
| Line 78: | Line 79: | ||
! colspan="3" | Notes | ! colspan="3" | Notes | ||
|- | |- | ||
| − | | colspan="3" | Uses custom Ice Wave attack. | + | | colspan="3" | Uses custom Ice Wave attack. Spams ice flowers and icicles in areas around him whenever he is attacked, to block your movements and damage you |
|- | |- | ||
| − | ! colspan="3" style="background:#a0c6e3;" |[[Image:Icon Octopus Hunter. | + | ! colspan="3" style="background:#a0c6e3;" |[[Image:Icon-Octopus Hunter.png|28px|left]] [[Octopus Hunter]] ([[Priest]]) |
|- | |- | ||
| − | | align="center" rowspan="2" | [[Image:Octopus Hunter. | + | | align="center" rowspan="2" | [[Image:Octopus Hunter.png]] |
! Location | ! Location | ||
|- | |- | ||
| Line 94: | Line 95: | ||
|- | |- | ||
| − | ! colspan="3" style="background:#a0c6e3;" |[[Image:Icon Necromancer Deathword.jpg|28px|left]] Necromancer Deathword([[Slayer]]) | + | ! colspan="3" style="background:#a0c6e3;" |[[Image:Icon Necromancer Deathword.jpg|28px|left]] [[Necromancer Deathword]] ([[Slayer]]) |
|- | |- | ||
| − | | align="center" rowspan="2" | [[Image:Necromancer Deathword. | + | | align="center" rowspan="2" | [[Image:Necromancer Deathword.png]] |
! Location | ! Location | ||
|- | |- | ||
| Line 104: | Line 105: | ||
! colspan="3" | Notes | ! colspan="3" | Notes | ||
|- | |- | ||
| − | | colspan="3" | Uses custom attack | + | | colspan="3" | Uses custom attack, summons Undead GBL Zealots |
|- | |- | ||
| − | ! colspan="3" style="background:#a0c6e3;" |[[Image:Icon Hughton.jpg|28px|left]] | + | ! colspan="3" style="background:#a0c6e3;" |[[Image:Icon Hughton.jpg|28px|left]] [[Houghton, King of Destruction]] ([[Monk]]) |
|- | |- | ||
| align="center" rowspan="2" | [[Image:Hughton.jpg]] | | align="center" rowspan="2" | [[Image:Hughton.jpg]] | ||
| Line 117: | Line 118: | ||
! colspan="3" | Notes | ! colspan="3" | Notes | ||
|- | |- | ||
| − | | colspan="3" | | + | | colspan="3" | Boss summon - Dodges with [[Sway]] and [[Ducking Dash]], fights with an overpowered [[Lucky Straight Punch]]. (Straight punch like a man!) |
|- | |- | ||
| − | ! colspan="3" style="background:#a0c6e3;" |[[Image:Icon .jpg|28px|left]] Wacky Lim Lim ([[Battle Mage]]) | + | ! colspan="3" style="background:#a0c6e3;" |[[Image:Icon Wacky Lim Lim.jpg|28px|left]] [[Wacky Lim Lim]] ([[Battle Mage]]) |
|- | |- | ||
| − | | align="center" rowspan="2" | [[Image:.jpg]] | + | | align="center" rowspan="2" | [[Image:Wacky Lim Lim.jpg]] |
! Location | ! Location | ||
|- | |- | ||
| Line 130: | Line 131: | ||
! colspan="3" | Notes | ! colspan="3" | Notes | ||
|- | |- | ||
| − | | colspan="3" | Uses [[Stabbing Wheel]]. Also has access to [[Elementalist]]'s [[Fire Pillar]] skill. | + | | colspan="3" | Uses [[Stabbing Wheel]], [[Punto Wave]], and [[Mana Shield]] to protect herself from attacks. Also has access to the [[Elementalist]]'s [[Fire Pillar (elementalist skill)|Fire Pillar]] skill. |
|- | |- | ||
| − | ! colspan="3" style="background:#a0c6e3;" |[[Image:Icon Sewer Queen Faris.jpg|28px|left]] Sewer | + | ! colspan="3" style="background:#a0c6e3;" |[[Image:Icon Sewer Queen Faris.jpg|28px|left]] [[Sewer Princess Faris]] ([[Brawler]]) |
|- | |- | ||
| align="center" rowspan="2" | [[Image:Sewer Queen Faris.jpg]] | | align="center" rowspan="2" | [[Image:Sewer Queen Faris.jpg]] | ||
| Line 143: | Line 144: | ||
! colspan="3" | Notes | ! colspan="3" | Notes | ||
|- | |- | ||
| − | | colspan="3" | Has a vicious [[Raging Vulcan]] attack that will | + | | colspan="3" | Has a vicious [[Raging Vulcan]] attack that will 40HKO most classes. Her [[Mount]] does 20 hits. Spams Double Throw, Berserk Dragon Cry, and constantly plants Screaming Vine Plants and inflicts darkness upon getting hit. Uses several basic [[Brawler]] skills. Seems to have equipped a Gileimo as well. |
| + | |||
| + | |- | ||
| + | ! colspan="3" style="background:#a0c6e3;" |[[Image:Chuseol_icon.png|28px|left]] [[Chuseol]] ([[Exorcist]]) | ||
| + | |- | ||
| + | | align="center" rowspan="2" | [[Image:Blizzard Chuseol sprite.png]] | ||
| + | ! Location | ||
| + | |- | ||
| + | | [[Bwanga's Camp]]: 9th room | ||
| + | [[File:Map_Bwanga.JPG]] | ||
| + | |- | ||
| + | ! colspan="3" | Notes | ||
| + | |- | ||
| + | | colspan="3" | Spams [[Giant Weapon Launcher]], [[Chaos Hammer]], and [[Phoenix Hammer]]. Attacks cause Ice shards to fall from the sky due to having equipped Blizzard Totem. Seems to have equipped Charlie's Necklace as well, having a chance to summon [[Wild Toy Soldier]] when hit. | ||
| + | |||
| + | |- | ||
| + | ! colspan="3" style="background:#a0c6e3;" |[[Image:Engelheim_icon.png|28px|left]] [[Heat Wave Engelheim]] ([[Asura]]) | ||
| + | |- | ||
| + | | align="center" rowspan="2" | [[Image:Heat Wave Engelheim.png]] | ||
| + | ! Location | ||
| + | |- | ||
| + | | [[Frostfield]]: 3rd room | ||
| + | |||
| + | |- | ||
| + | ! colspan="3" | Notes | ||
| + | |- | ||
| + | | colspan="3" | Spams [[Neutral Wave Sword]], [[Wave Radiation]], [[Wave Wheel Slasher]] and [[Fire Wave Sword]]. May cast super armor when using spells. | ||
| + | |||
| + | |- | ||
| + | ! colspan="3" style="background:#a0c6e3;" |[[Image:Psychopath-icon.jpg|28px|left]] [[Psychopath]] ([[Monk]]) | ||
| + | |- | ||
| + | | align="center" rowspan="2" | [[Image:Psychopath.png]] | ||
| + | ! Location | ||
| + | |- | ||
| + | | [[Moonlight Tavern]]: 2nd Room | ||
| + | |||
| + | |- | ||
| + | ! colspan="3" | Notes | ||
| + | |- | ||
| + | | colspan="3" | Attacks and moves slowly. Primarily uses Monk dashing skills, and dodges with [[Sway]]. | ||
| + | |||
| + | |- | ||
| + | ! colspan="3" style="background:#a0c6e3;" |[[Image:julio-icon.jpg|28px|left]] [[Julio Quickfoot]] ([[Soul Bender]]) | ||
| + | |- | ||
| + | | align="center" rowspan="2" | [[Image:julio.jpg]] | ||
| + | ! Location | ||
| + | |- | ||
| + | | [[Moonlight Tavern]]: Left-most room | ||
| + | |||
| + | |- | ||
| + | ! colspan="3" | Notes | ||
| + | |- | ||
| + | | colspan="3" | Fights like a Soul Bender, summons [[Bremen]] and [[Saya]], attacks with [[Phantasmal Slayer]] and [[Ghost Slash]] | ||
| + | |||
| + | |- | ||
| + | ! colspan="3" style="background:#a0c6e3;" |[[Image:aganzo-icon.jpg|28px|left]] [[Aganzo]] ([[Blademaster]], special enemy) | ||
| + | |- | ||
| + | | align="center" rowspan="2" | [[Image:aganzo.jpg]] | ||
| + | ! Location | ||
| + | |- | ||
| + | | [[Moonlight Tavern]]: Top-middle room | ||
| + | |||
| + | |- | ||
| + | ! colspan="3" | Notes | ||
| + | |- | ||
| + | | colspan="3" | Extremely powerful! Spams high level blademaster skills, combos a lot, and if pressured sufficiently, will proceed to use the Blademaster's awakening, [[Sword Storm]]. His [[Illusion Sword Dance]] also releases twisters. | ||
| + | |||
| + | |- | ||
| + | ! colspan="3" style="background:#a0c6e3;" |[[Image:sammjang-icon.jpg|28px|left]] [[Samm Jang]] ([[Brawler]]) | ||
| + | |- | ||
| + | | align="center" rowspan="2" | [[Image:sammjang.jpg]] | ||
| + | ! Location | ||
| + | |- | ||
| + | | [[Moonlight Tavern]] boss | ||
| + | |||
| + | |- | ||
| + | ! colspan="3" | Notes | ||
| + | |- | ||
| + | | colspan="3" | Very dangerous, uses various Brawler skills and grabs. If you are fighting her on King's Road, she will cast permanent super-armor once her health is low enough. | ||
| + | |||
| + | |- | ||
| + | ! colspan="3" style="background:#a0c6e3;" |[[Image:arsonist-icon.jpg|28px|left]] [[Kartel Arsonist]] ([[Spitfire]]) | ||
| + | |- | ||
| + | | align="center" rowspan="2" | [[Image:Kartel Arsonist.png]] | ||
| + | ! Location | ||
| + | |- | ||
| + | | [[Ghent Outskirts]]: The two rooms, two spaces below and above the starting point | ||
| + | [[File:OuterGhentMap.gif]] | ||
| + | |||
| + | |- | ||
| + | ! colspan="3" | Notes | ||
| + | |- | ||
| + | | colspan="3" | Spawns and attacks en masse, a group of Arsonists will attack together and spam multiple [[Napalm]] shots at once. | ||
| + | |||
| + | |- | ||
| + | ! colspan="3" style="background:#a0c6e3;" |[[Image:signalman-icon.jpg|28px|left]] [[TMH Signalman]] ([[Mechanic]]) | ||
| + | |- | ||
| + | | align="center" rowspan="2" | [[Image:signalman.jpg]] | ||
| + | ! Location | ||
| + | |- | ||
| + | | [[East Ghent Gate]]: The middle room | ||
| + | [[File:EastGhentMap.GIF]] | ||
| + | |||
| + | |- | ||
| + | ! colspan="3" | Notes | ||
| + | |- | ||
| + | | colspan="3" | Does not do anything other than run away from you, hide with camouflage. Uses [[Mech Drop]] occasionally. | ||
| + | |||
| + | |- | ||
| + | ! colspan="3" style="background:#a0c6e3;" |[[Image:rustybullet-icon.jpg|28px|left]] [[Rusty Bullet Squad]] ([[Launcher]]) | ||
| + | |- | ||
| + | | align="center" rowspan="2" | [[Image:rustybullet.png]] | ||
| + | ! Location | ||
| + | |- | ||
| + | | [[South Ghent Gate]]: The bottom left-most and bottom right-most rooms | ||
| + | [[File:SouthGhentMap.gif]] | ||
| + | |||
| + | |- | ||
| + | ! colspan="3" | Notes | ||
| + | |- | ||
| + | | colspan="3" | A squad of 6-7 Launchers that only spam [[M-137 Gatling Gun]] and plant [[EX-S Viper]]s. Tends to attack together and will attempt to pin you back with projectiles. | ||
|} | |} | ||
[[Category:Monsters]] | [[Category:Monsters]] | ||
Latest revision as of 21:29, 21 March 2016

|
Seria says: "Nothing should be as mysterious as I am!"
Page layout and data is outdated. Refer to individual APC pages. |
Enemies that resemble playable classes. The simplest versions will spam only one skills while the more advanced enemies will possess combos.
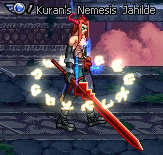
| Kuran's Nemesis Jahilde (Asura) | ||
|---|---|---|
|
Location | |
| Purgatorium: Room A3 | ||
| Notes | ||
| Spams Neutral Wave Sword and occasionally uses Wave Radiation. | ||
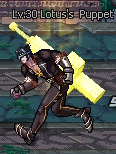
| Lotus's Puppet (Crusader) | ||
|
Location | |
| Outer Temple Walls: Room C5 | ||
| Notes | ||
| Buffs self with Strike, and goes on the offensive with Giant Weapon Launcher and Blades of Purity. | ||
| Treasure Hunter Jakarta (Brawler) | ||

|
Location | |
| Silver Night: Room D3 | ||
| Notes | ||
| Will attempt to Double Throw Split Disks, and uses Explosive Hook often. Occasionally uses Apply Poison. Spams Muse's Uppercut after being knocked down. | ||
| Empyrean Wanderer Magney (Mechanic) | ||
| Location | ||
| Second Spine: Will always spawn in Room D1, and has a chance of spawning in room C1 and B1 | ||
| Notes | ||
| Uses BBQ and summons RX-78 Land Runners and Ez-8 Time Bombs. The intelligence quest requires you to defeat him in room C1. | ||
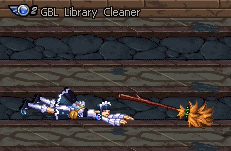
| GBL Library Cleaner (Witch) | ||
|
Location | |
| GBL Arad Branch: Room A1, D1, C3 | ||
| Notes | ||
| Uses basic melee attack and air dashes around. | ||
| Frostbite Xile (Gunner) | ||
| Location | ||
| GBL Laboratory: Room A4 | ||
| Notes | ||
| Uses custom Ice Wave attack. Spams ice flowers and icicles in areas around him whenever he is attacked, to block your movements and damage you | ||
| Octopus Hunter (Priest) | ||

|
Location | |
| GBL Laboratory: | ||
| Notes | ||
| Uses Furious Grab | ||
| Necromancer Deathword (Slayer) | ||

|
Location | |
| GBL Hatchery: Room C2, D1 | ||
| Notes | ||
| Uses custom attack, summons Undead GBL Zealots | ||
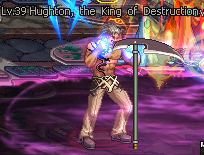
| Houghton, King of Destruction (Monk) | ||
|
Location | |
| GBL Hatchery: Boss Room | ||
| Notes | ||
| Boss summon - Dodges with Sway and Ducking Dash, fights with an overpowered Lucky Straight Punch. (Straight punch like a man!) | ||
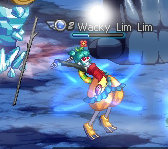
| Wacky Lim Lim (Battle Mage) | ||
|
Location | |
| Ryku Point: Room A4, B3, B5 | ||
| Notes | ||
| Uses Stabbing Wheel, Punto Wave, and Mana Shield to protect herself from attacks. Also has access to the Elementalist's Fire Pillar skill. | ||
| Sewer Princess Faris (Brawler) | ||

|
Location | |
| Shallow Keep: Run the map counter-clock wise | ||
| Notes | ||
| Has a vicious Raging Vulcan attack that will 40HKO most classes. Her Mount does 20 hits. Spams Double Throw, Berserk Dragon Cry, and constantly plants Screaming Vine Plants and inflicts darkness upon getting hit. Uses several basic Brawler skills. Seems to have equipped a Gileimo as well. | ||
| Chuseol (Exorcist) | ||
| Location | ||
| Bwanga's Camp: 9th room | ||
| Notes | ||
| Spams Giant Weapon Launcher, Chaos Hammer, and Phoenix Hammer. Attacks cause Ice shards to fall from the sky due to having equipped Blizzard Totem. Seems to have equipped Charlie's Necklace as well, having a chance to summon Wild Toy Soldier when hit. | ||
| Heat Wave Engelheim (Asura) | ||

|
Location | |
| Frostfield: 3rd room | ||
| Notes | ||
| Spams Neutral Wave Sword, Wave Radiation, Wave Wheel Slasher and Fire Wave Sword. May cast super armor when using spells. | ||
| Psychopath (Monk) | ||

|
Location | |
| Moonlight Tavern: 2nd Room | ||
| Notes | ||
| Attacks and moves slowly. Primarily uses Monk dashing skills, and dodges with Sway. | ||
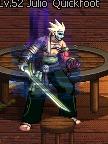
| Julio Quickfoot (Soul Bender) | ||
|
Location | |
| Moonlight Tavern: Left-most room | ||
| Notes | ||
| Fights like a Soul Bender, summons Bremen and Saya, attacks with Phantasmal Slayer and Ghost Slash | ||
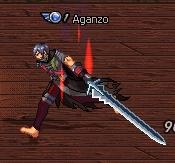
| Aganzo (Blademaster, special enemy) | ||
|
Location | |
| Moonlight Tavern: Top-middle room | ||
| Notes | ||
| Extremely powerful! Spams high level blademaster skills, combos a lot, and if pressured sufficiently, will proceed to use the Blademaster's awakening, Sword Storm. His Illusion Sword Dance also releases twisters. | ||
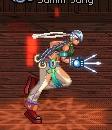
| Samm Jang (Brawler) | ||
|
Location | |
| Moonlight Tavern boss | ||
| Notes | ||
| Very dangerous, uses various Brawler skills and grabs. If you are fighting her on King's Road, she will cast permanent super-armor once her health is low enough. | ||
| Kartel Arsonist (Spitfire) | ||

|
Location | |
| Ghent Outskirts: The two rooms, two spaces below and above the starting point | ||
| Notes | ||
| Spawns and attacks en masse, a group of Arsonists will attack together and spam multiple Napalm shots at once. | ||
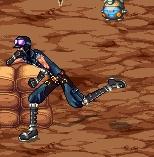
| TMH Signalman (Mechanic) | ||
|
Location | |
| East Ghent Gate: The middle room | ||
| Notes | ||
| Does not do anything other than run away from you, hide with camouflage. Uses Mech Drop occasionally. | ||
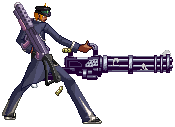
| Rusty Bullet Squad (Launcher) | ||
|
Location | |
| South Ghent Gate: The bottom left-most and bottom right-most rooms | ||
| Notes | ||
| A squad of 6-7 Launchers that only spam M-137 Gatling Gun and plant EX-S Vipers. Tends to attack together and will attempt to pin you back with projectiles. | ||
Pages in category "Automated Player Character family"
The following 58 pages are in this category, out of 58 total.
