Welcome to the DFO World Wiki. With many major updates since the release of DFO, many items are missing. Visit Item Database Project to learn more.
Please remember to click "show preview" before saving the page.
Thanks for the updated logo snafuPop!
Difference between revisions of "Ozma of Chaos"
m (→Quotes) |
NoirGraves (talk | contribs) m |
||
| (67 intermediate revisions by 4 users not shown) | |||
| Line 1: | Line 1: | ||
| + | {{SpoilerWarning}} | ||
{{NPCs | {{NPCs | ||
|Icon = | |Icon = | ||
|Name = Ozma of Chaos | |Name = Ozma of Chaos | ||
|Image = [[File:Portrait-{{PAGENAME}}.png]] | |Image = [[File:Portrait-{{PAGENAME}}.png]] | ||
| − | |Age = | + | |Age = 42 (at the time of death) |
|Sex = Male | |Sex = Male | ||
| − | |Race = Human | + | |Race = Human (Former)<br>Demon |
| − | |Occupation = | + | |Affiliation= [[Pelos Empire]] (Former)<br>The Imposter Legion |
| + | |Occupation = Pelos Empire Court Magician (Former)<br>The God of Chaos<br>The Eleventh Apostle (<u>Korean</u>: <ruby>第<rt>제</rt></ruby>11<ruby>使<rt>사</rt>徒<rt>도</rt></ruby> ''Je Sib-il Sado'') | ||
| + | |Alias=Great Mage Ozma<br>{{HoverText|The One Who Rose from Death / The One Who Resurrected (<u>Korean</u>: 죽음에서 일어난 <ruby>者<rt>자</rt></ruby> ''Jugeumeseo Ireonan Ja'')|As referred to in New Genesis: Chapter 1}} | ||
|Location = [[Dark Side]] | |Location = [[Dark Side]] | ||
| + | |ForeignName= | ||
| + | {{ForeignName | ||
| + | |kr=<ruby>混<rt>혼</rt>沌<rt>돈</rt></ruby>의 오즈마 ''Hondone Ojeuma,'' "Ozma of Chaos" | ||
| + | |cn=混沌之神奥兹玛 ''Hùndùn zhī shén àozīmǎ,'' "Ozma, the God of Chaos" | ||
| + | |jp=混沌のオズマ ''Konton no Ozuma,'' "Ozma of Chaos" | ||
| + | }} | ||
}} | }} | ||
<center>{{Quotation|Kazan... Will you become the God of Destruction? Then I will become the God of Chaos.}}</center> | <center>{{Quotation|Kazan... Will you become the God of Destruction? Then I will become the God of Chaos.}}</center> | ||
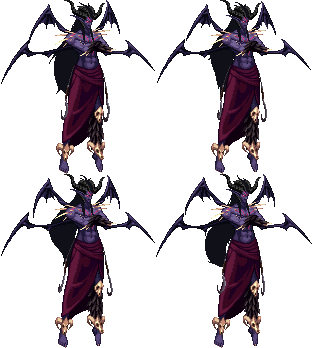
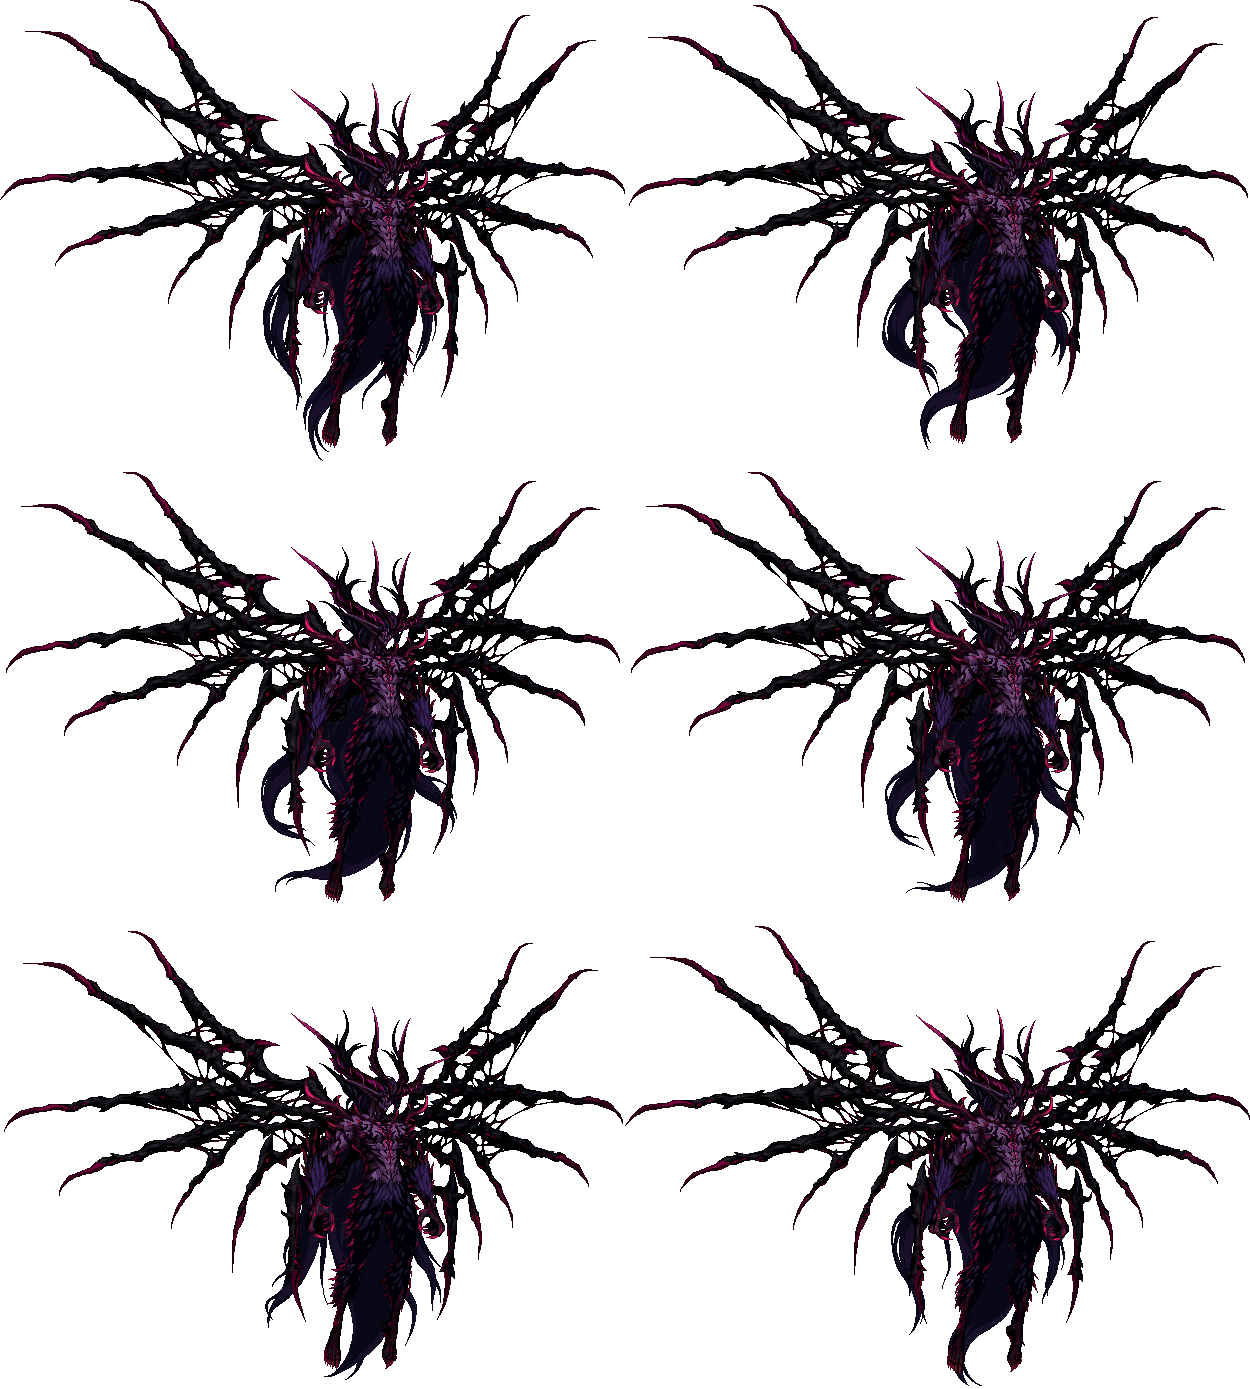
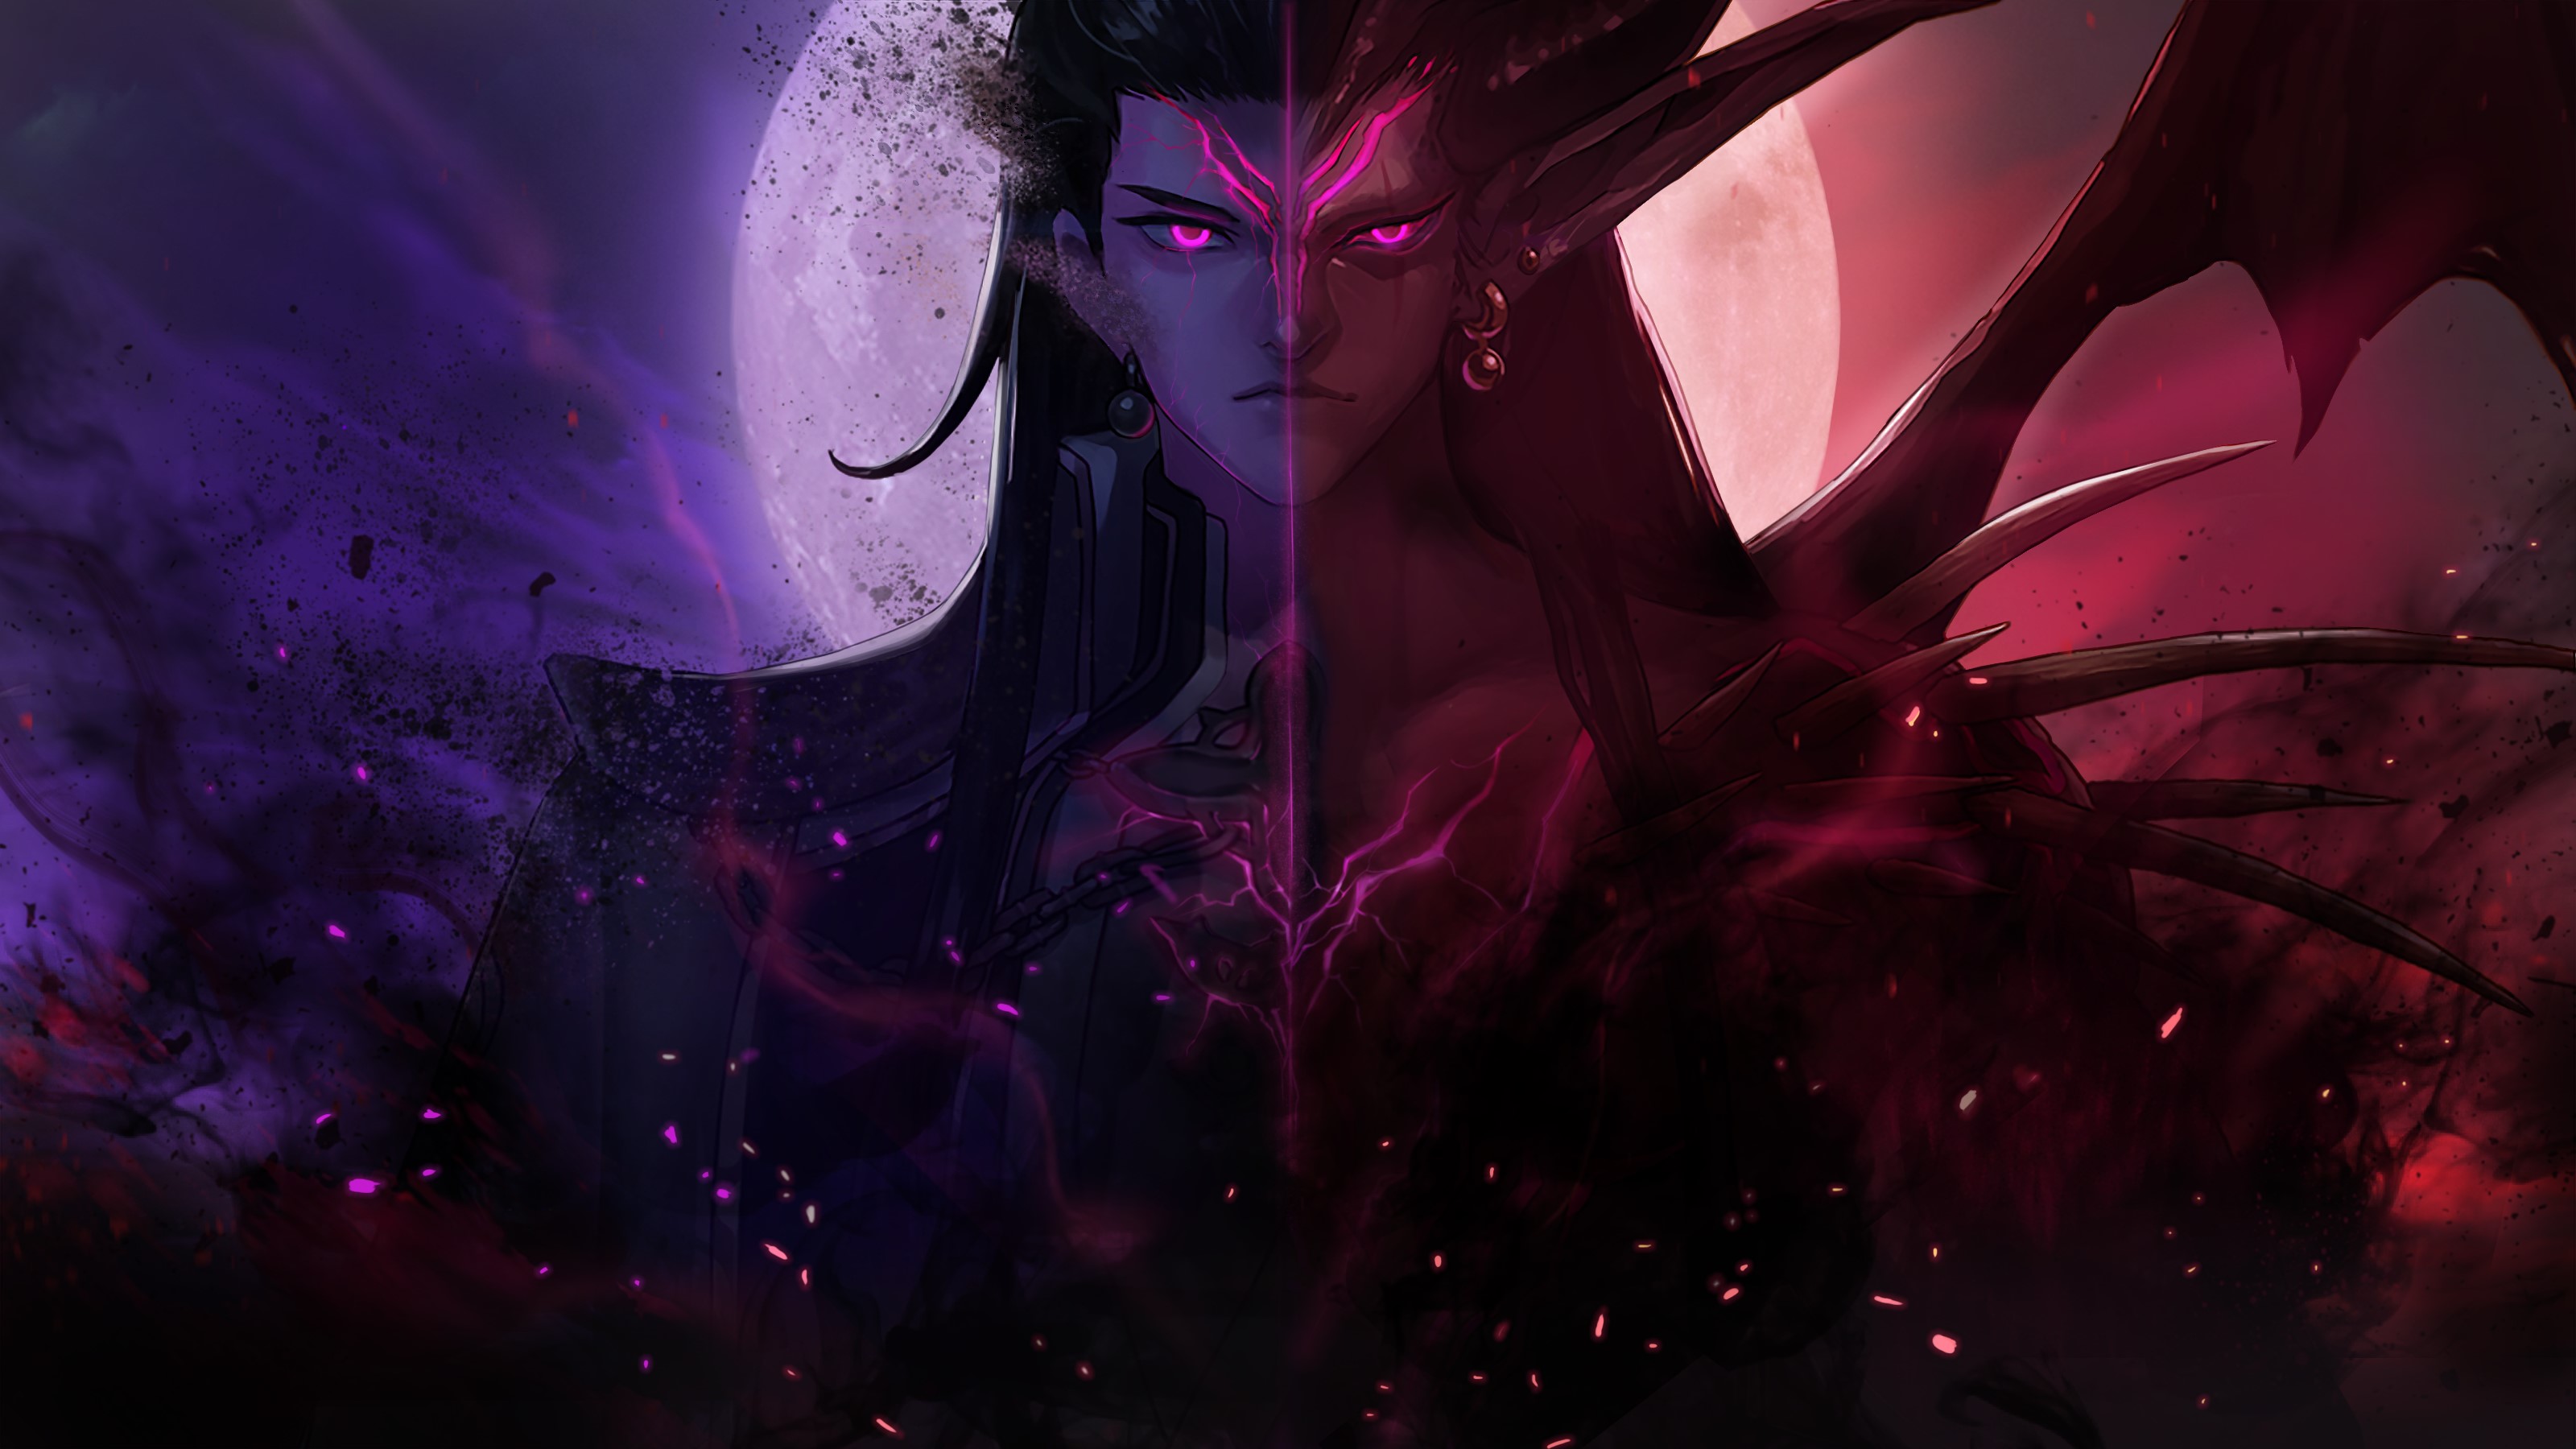
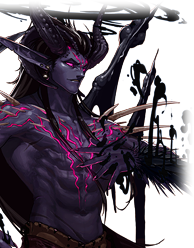
| − | + | '''Ozma of Chaos''' (<u>Korean</u>: 혼돈의 오즈마 ''Hondone Ojeuma''), also known as the '''God of Chaos''' (<u>Korean</u>: 혼돈의 신 ''Hondone Sin''), is an enemy character and secondary antagonist from ''Dungeon Fighter Online (DFO)'' and ''Dungeon & Fighter Mobile (DNFM)''. In ''DFO'', he originally served as the final boss for the now unavailable [[Otherverse]] dungeon [[Dark Side]], and currently acts as primary antagonist of the [[Black Order Resurgence Arc]] and the final boss for the [[Otherworldly Dark Side]] dungeon [[Throne of Chaos (Dungeon)|Throne of Chaos]]. In <i>DNFM</i>'s version of Ozma Raid, he appears with three phase variations: an angelic version known as '''Ozma of Creation''' (<u>Korean</u>: 창조의 오즈마 ''Changjoe Ojeuma''), an apocalyptic version known as '''Ozma of Armageddon''' (<u>Korean</u>: 종말의 오즈마 ''Jongmare Ojeuma''), and a void version known as '''Ozma of Nothingness''' (<u>Korean</u>: 무의 오즈마 ''Mue Ojeuma''). | |
| + | |||
| + | Originally a hero of the [[Pelos Empire]] from 800 years ago, he was betrayed and sentenced to death by the very people he swore to protect. He made a deal with a [[Reaper]] that transformed him into a Demon, and waged a century-long war against mankind known as the [[Black Crusade]], which nearly wiped out the human race from Arad over 600 years ago. He is responsible for the creation of the [[Imposter]]s, the [[Curse of Blood]], and the [[God of Destruction]], the decline and fall of the Pelos Empire, and the recent appearance of Demons on the Arad Continent as well as the indirect creation of the [[Priest Order]], the [[Black Order]], the [[Kazan Syndrome]], the [[Avenger]]s, and the [[Mistress Phenomenon]]. | ||
| + | |||
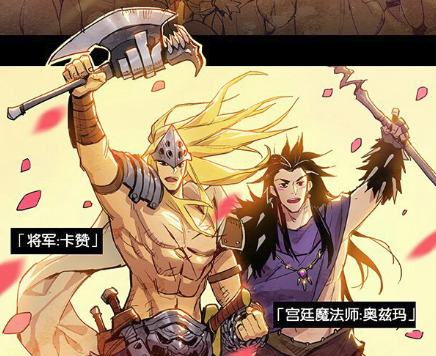
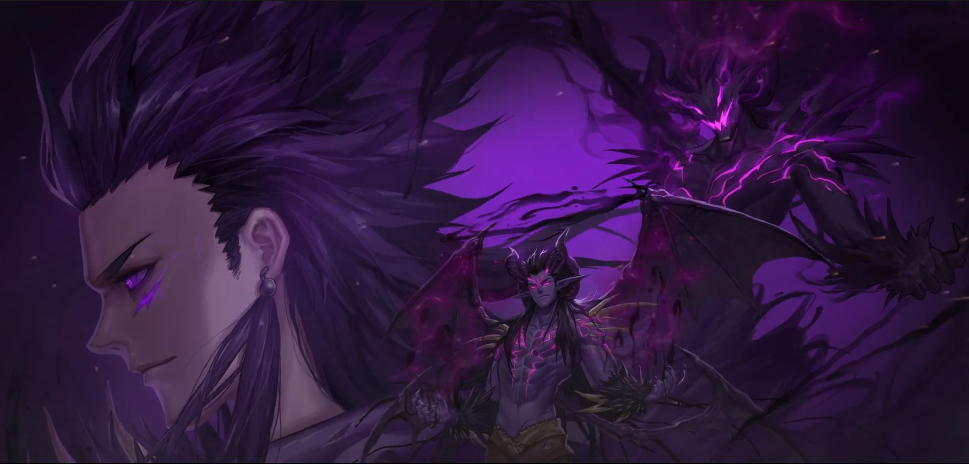
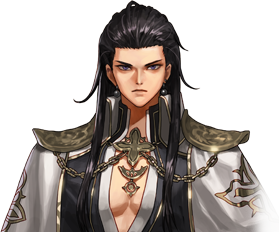
| + | According to Aradian history, he was once a human known as the '''Great Mage Ozma''', a magical prodigy who was raised by the [[Elves]], once regarded as the greatest mage in the Pelos Empire. Renown for many feats, his greatest was saving the Arad Continent with his friend [[Great General Kazan]] from the [[Dragon]] invasion led by the [[Berserk Dragon Hismar]]. However, after the then [[Palmerier I|Pelos Emperor]] framed him and Kazan for treason and sentenced them to death in an act of fear and jealousy, Ozma sold his own soul to a Reaper in exchange for the power to enact his revenge and to cleanse the world of the sins of humanity. After his execution, Ozma resurrected from death as a Demon, and with his newfound powers as the 'God of Chaos', he unleashed a plague upon the land which plunged Arad into an Age of Chaos and mustered a Demon army to eradicate mankind. During his conquest, he waged war against mankind's last alliance led by [[Michael of the Holy Eye]], which consisted of the forces of Pelos, [[Suju]], and the Priest Order, who ultimately defeated him and sealed him away along with his army and the entirety of Dark Side within another dimension known as the [[Otherverse]]. | ||
| + | |||
| + | Although, Ozma remains sealed for now, his presence still lingers: Imposters continue to roam the continent and signs of his seal weakening and of his resurrection become more evident with every subsequent [[Metastasis]] as increasingly more Demons arrive from the other world. It seems while trapped, Ozma still continues his campaign to eradicate mankind, readying a new army of Imposters to wage another Crusade against Arad when he escapes from his dimensional prison. | ||
| + | |||
| + | Prior to the [[Great Metastasis Update]], Ozma initially appeared as the final enemy of [[Dark Side]] during the Priest Order's investigation of the Otherverse in the [[Epic Quests]] [[Once More Into the Breach]], where he was revealed to be the '''Eleventh Apostle''' (<u>Korean</u>: 제11사도 ''Je Sib-il Sado'') of [[Pandemonium]], also known as '''The One Who Rose from Death''' (<u>Korean</u>: 죽음에서 일어난 자 ''Jugeumeseo Ireonan Ja''). However, after the [[Origin Update]], this reveal was changed to an unspecified time after his imprisonment and prior to the canonization of [[Saint Michael]] as an Apostle, and his reappearance would be at the finale of the [[Black Order Resurgence Arc]]. | ||
== History == | == History == | ||
[[File:Kazan and Ozma.png|thumb|right|250px|Ozma and Kazan as national heroes]] | [[File:Kazan and Ozma.png|thumb|right|250px|Ozma and Kazan as national heroes]] | ||
| − | More than 800 years prior to the events of the story, Ozma was once known as the greatest wizard in the [[Pelos Empire]]. In Arad Year 152, he and his friend, Pelos General [[Kazan]], saved the world by killing the [[Berserk Dragon Hismar]], ending his 52 year long reign of terror. The two individuals were regarded as national heroes and their strength helped bring the Pelos Empire to the peak of its power. | + | More than 800 years prior to the events of the story, Ozma was once known as the greatest wizard in the [[Pelos Empire]]. In Arad Year 152, he and his friend, Pelos General [[Kazan (Character)|Kazan]], saved the world by killing the [[Berserk Dragon Hismar]], ending his 52 year long reign of terror. The two individuals were regarded as national heroes and their strength helped bring the Pelos Empire to the peak of its power. |
However as years passed, the Pelos Emperor grew paranoid and wary of their fame, believing that their power would eventually rival his own and cause him to be overthrown. It was during this time, a [[Iris|mysterious hooded individual]] arrived, and informed the Emperor of a [[Iris's Prophecies#The King and the Jackal|prophecy]] which foretold the eminent destruction of the empire. In an attempt to avoid fate, the Emperor orchestrated a conspiracy to get rid of both Ozma and Kazan, but in doing so, sealed the Empire's demise. | However as years passed, the Pelos Emperor grew paranoid and wary of their fame, believing that their power would eventually rival his own and cause him to be overthrown. It was during this time, a [[Iris|mysterious hooded individual]] arrived, and informed the Emperor of a [[Iris's Prophecies#The King and the Jackal|prophecy]] which foretold the eminent destruction of the empire. In an attempt to avoid fate, the Emperor orchestrated a conspiracy to get rid of both Ozma and Kazan, but in doing so, sealed the Empire's demise. | ||
| Line 37: | Line 54: | ||
While trapped, Ozma readied a new army of Imposters to wage another war upon Arad for when he would eventually escape from his dimensional prison. But he was not alone; trapped along with him was the Priest General, Michael of the Holy Eye. For centuries, the two individuals constantly clashed with one another, unable to kill each other. It wouldn't be until Arad Year 993, when the seal on dimension prison weakened, could Ozma begin sending small portions of his army, Chaos Demons, back into Arad. | While trapped, Ozma readied a new army of Imposters to wage another war upon Arad for when he would eventually escape from his dimensional prison. But he was not alone; trapped along with him was the Priest General, Michael of the Holy Eye. For centuries, the two individuals constantly clashed with one another, unable to kill each other. It wouldn't be until Arad Year 993, when the seal on dimension prison weakened, could Ozma begin sending small portions of his army, Chaos Demons, back into Arad. | ||
| − | Around Arad Year | + | Around Arad Year 1002, the Priest Order upon investigating the Chaos Demon phenomenon had discovered a demon stronghold in the Otherverse. It was at this time, his longtime adversary, Michael, had met his end to a group of adventurers exploring the [[Interdimensional Rift]]. With now nothing holding him back, Ozma prepared his army for war. However, before he could leave his dimensional prison, he was stopped by the same group of adventurers. Although he was greatly weakened from his centuries long struggle with Michael, Ozma fought against the adventurers and met his inevitable end. |
Although the Priest Order and the people of Arad celebrated the death of Ozma, heavy residual effects remained. In their blind pursuit to vanquish evil, they had caused the deaths of two more Apostles, bringing [[Hilder]]'s plan two steps closer into fruition. Unbeknownst to them, the inevitable destruction of Arad, loomed ever so near... | Although the Priest Order and the people of Arad celebrated the death of Ozma, heavy residual effects remained. In their blind pursuit to vanquish evil, they had caused the deaths of two more Apostles, bringing [[Hilder]]'s plan two steps closer into fruition. Unbeknownst to them, the inevitable destruction of Arad, loomed ever so near... | ||
| + | |||
| + | ==Personality== | ||
| + | <div class="mw-collapsible mw-collapsed"> | ||
| + | ===Overall=== | ||
| + | <div class="mw-collapsible-content"> | ||
| + | </div> | ||
| + | </div> | ||
| + | |||
| + | <div class="mw-collapsible mw-collapsed"> | ||
| + | ===Relationships=== | ||
| + | <div class="mw-collapsible-content"> | ||
| + | '''Kazan''' <br> | ||
| + | </div> | ||
| + | </div> | ||
== Quotes == | == Quotes == | ||
| Line 46: | Line 77: | ||
* "''See what loathesome creatures you truly are.''" | * "''See what loathesome creatures you truly are.''" | ||
* "''Let chaos reign supreme!''" | * "''Let chaos reign supreme!''" | ||
| − | * "''Ahh, this brings back memories... You did not have to come all this way you know. I was on my way to find all of you, I assure you. I suppose I should thank you for saving me the effort...''" | + | * "''Ahh, this brings back memories... You did not have to come all this way you know. I was on my way to find all of you, I assure you. I suppose I should thank you for saving me the effort...''" ~ Ozma confronting the Adventurers |
| − | * "'' | + | * "''You have done me quite a service, killing Michael as you did. As a token of my gratitude, if you leave now, I will not kill you. Oh my, you have that defiant look in your eyes. Just remember... I gave you a chance.''" ~ Ozma confronting the Adventurers again |
| − | * "''In the end... Michael | + | * "''In the end... I wonder... was Michael right about me? Does my death hasten the end of your world...? Answer me, Michael...!! Kazan... Ah, Kazan... This is hardly fair... You are the only one who could understand me... No... Not... Like this...! Please... do not take me like this...!! Kazan...''" ~ Ozma defeated by the Adventurers Ozma's final words. |
== Related Pages == | == Related Pages == | ||
*[[Lore_Episode#Episode_11:_Ozma_of_Chaos|Episode 11: Ozma of Chaos]] | *[[Lore_Episode#Episode_11:_Ozma_of_Chaos|Episode 11: Ozma of Chaos]] | ||
| + | *[[Black Order]] | ||
| + | *[[Imposter]] | ||
| + | *[[Michael of the Holy Eye]] | ||
| + | *[[Kazan (Character)|Kazan]] | ||
| − | = As an Enemy = | + | =As an Enemy (Otherverse)= |
{{Monster infobox | {{Monster infobox | ||
|image=Ozma of Chaos.gif | |image=Ozma of Chaos.gif | ||
|type=Demon | |type=Demon | ||
}} | }} | ||
| + | * Ozma originally made his first boss debut inside of the [[Otherverse]]'s [[Dark Side]], this dungeon has been removed upon the Global Client's arrival of Season 6. | ||
| − | == | + | <div class="mw-collapsible mw-collapsed"> |
| + | ===Dark Side Attacks & Guide=== | ||
| + | <div class="mw-collapsible-content"> | ||
*Ozma sends out slow moving dark fireball projectiles to hit players. | *Ozma sends out slow moving dark fireball projectiles to hit players. | ||
| Line 73: | Line 111: | ||
*'''Exchanging Sights:'''Ozma sends out a pillar of dark energy transforming two party members into a Scissorhands and Finthers, respectively. During this phase, players will be blinded and have obstructed vision. The Scissorhands player must cast Exchange Sights skill (Default hotkey: S) to remove the blind and obstructed vision. The Finthers player can instantly remove Cloak of Darkness with the special skill (Default hotkey: A). | *'''Exchanging Sights:'''Ozma sends out a pillar of dark energy transforming two party members into a Scissorhands and Finthers, respectively. During this phase, players will be blinded and have obstructed vision. The Scissorhands player must cast Exchange Sights skill (Default hotkey: S) to remove the blind and obstructed vision. The Finthers player can instantly remove Cloak of Darkness with the special skill (Default hotkey: A). | ||
| − | == Strategy == | + | === Strategy === |
*'''Gimmick:''' Ozma is immune to damage until his Cloak of Darkness is temporarily disabled. Ozma will be in an immobilized super armor state when vulnerable. Using any grabbing moves or immobilizing moves will renew his Cloak of Darkness. | *'''Gimmick:''' Ozma is immune to damage until his Cloak of Darkness is temporarily disabled. Ozma will be in an immobilized super armor state when vulnerable. Using any grabbing moves or immobilizing moves will renew his Cloak of Darkness. | ||
| Line 81: | Line 119: | ||
*Be aware of each monster's role and that monsters and teammates can attack one another. Team communication and using each monster's skill at the right time are the keys to success, otherwise the all party members will suffer from the persistent effects after the phase is over and take unnecessary damage. | *Be aware of each monster's role and that monsters and teammates can attack one another. Team communication and using each monster's skill at the right time are the keys to success, otherwise the all party members will suffer from the persistent effects after the phase is over and take unnecessary damage. | ||
| − | == | + | ===Rewards (Dark Side) === |
| − | + | ==== Priest Weapons ==== | |
| − | === Priest | ||
| − | |||
* {{Drops|Tainted Dimensional Scythe: Monk|dungeon=Dark Side|difficulty=Normal,Expert,Master}} | * {{Drops|Tainted Dimensional Scythe: Monk|dungeon=Dark Side|difficulty=Normal,Expert,Master}} | ||
* {{Drops|Tainted Dimensional Scythe: Exorcist|dungeon=Dark Side|difficulty=Normal,Expert,Master}} | * {{Drops|Tainted Dimensional Scythe: Exorcist|dungeon=Dark Side|difficulty=Normal,Expert,Master}} | ||
| Line 91: | Line 127: | ||
* {{Drops|Combo Breaker Scythe - Exorcist|dungeon=Dark Side|difficulty=Expert,Master}} | * {{Drops|Combo Breaker Scythe - Exorcist|dungeon=Dark Side|difficulty=Expert,Master}} | ||
* {{Drops|Protection of Death Scythe - Avenger|dungeon=Dark Side|difficulty=Expert,Master}} | * {{Drops|Protection of Death Scythe - Avenger|dungeon=Dark Side|difficulty=Expert,Master}} | ||
| + | </div> | ||
| + | </div> | ||
| + | |||
| + | =As an Enemy (Ozma Raid)= | ||
| + | <div class="mw-collapsible mw-collapsed"> | ||
| + | ===Phase 1 Move Set=== | ||
| + | <div class="mw-collapsible-content"> | ||
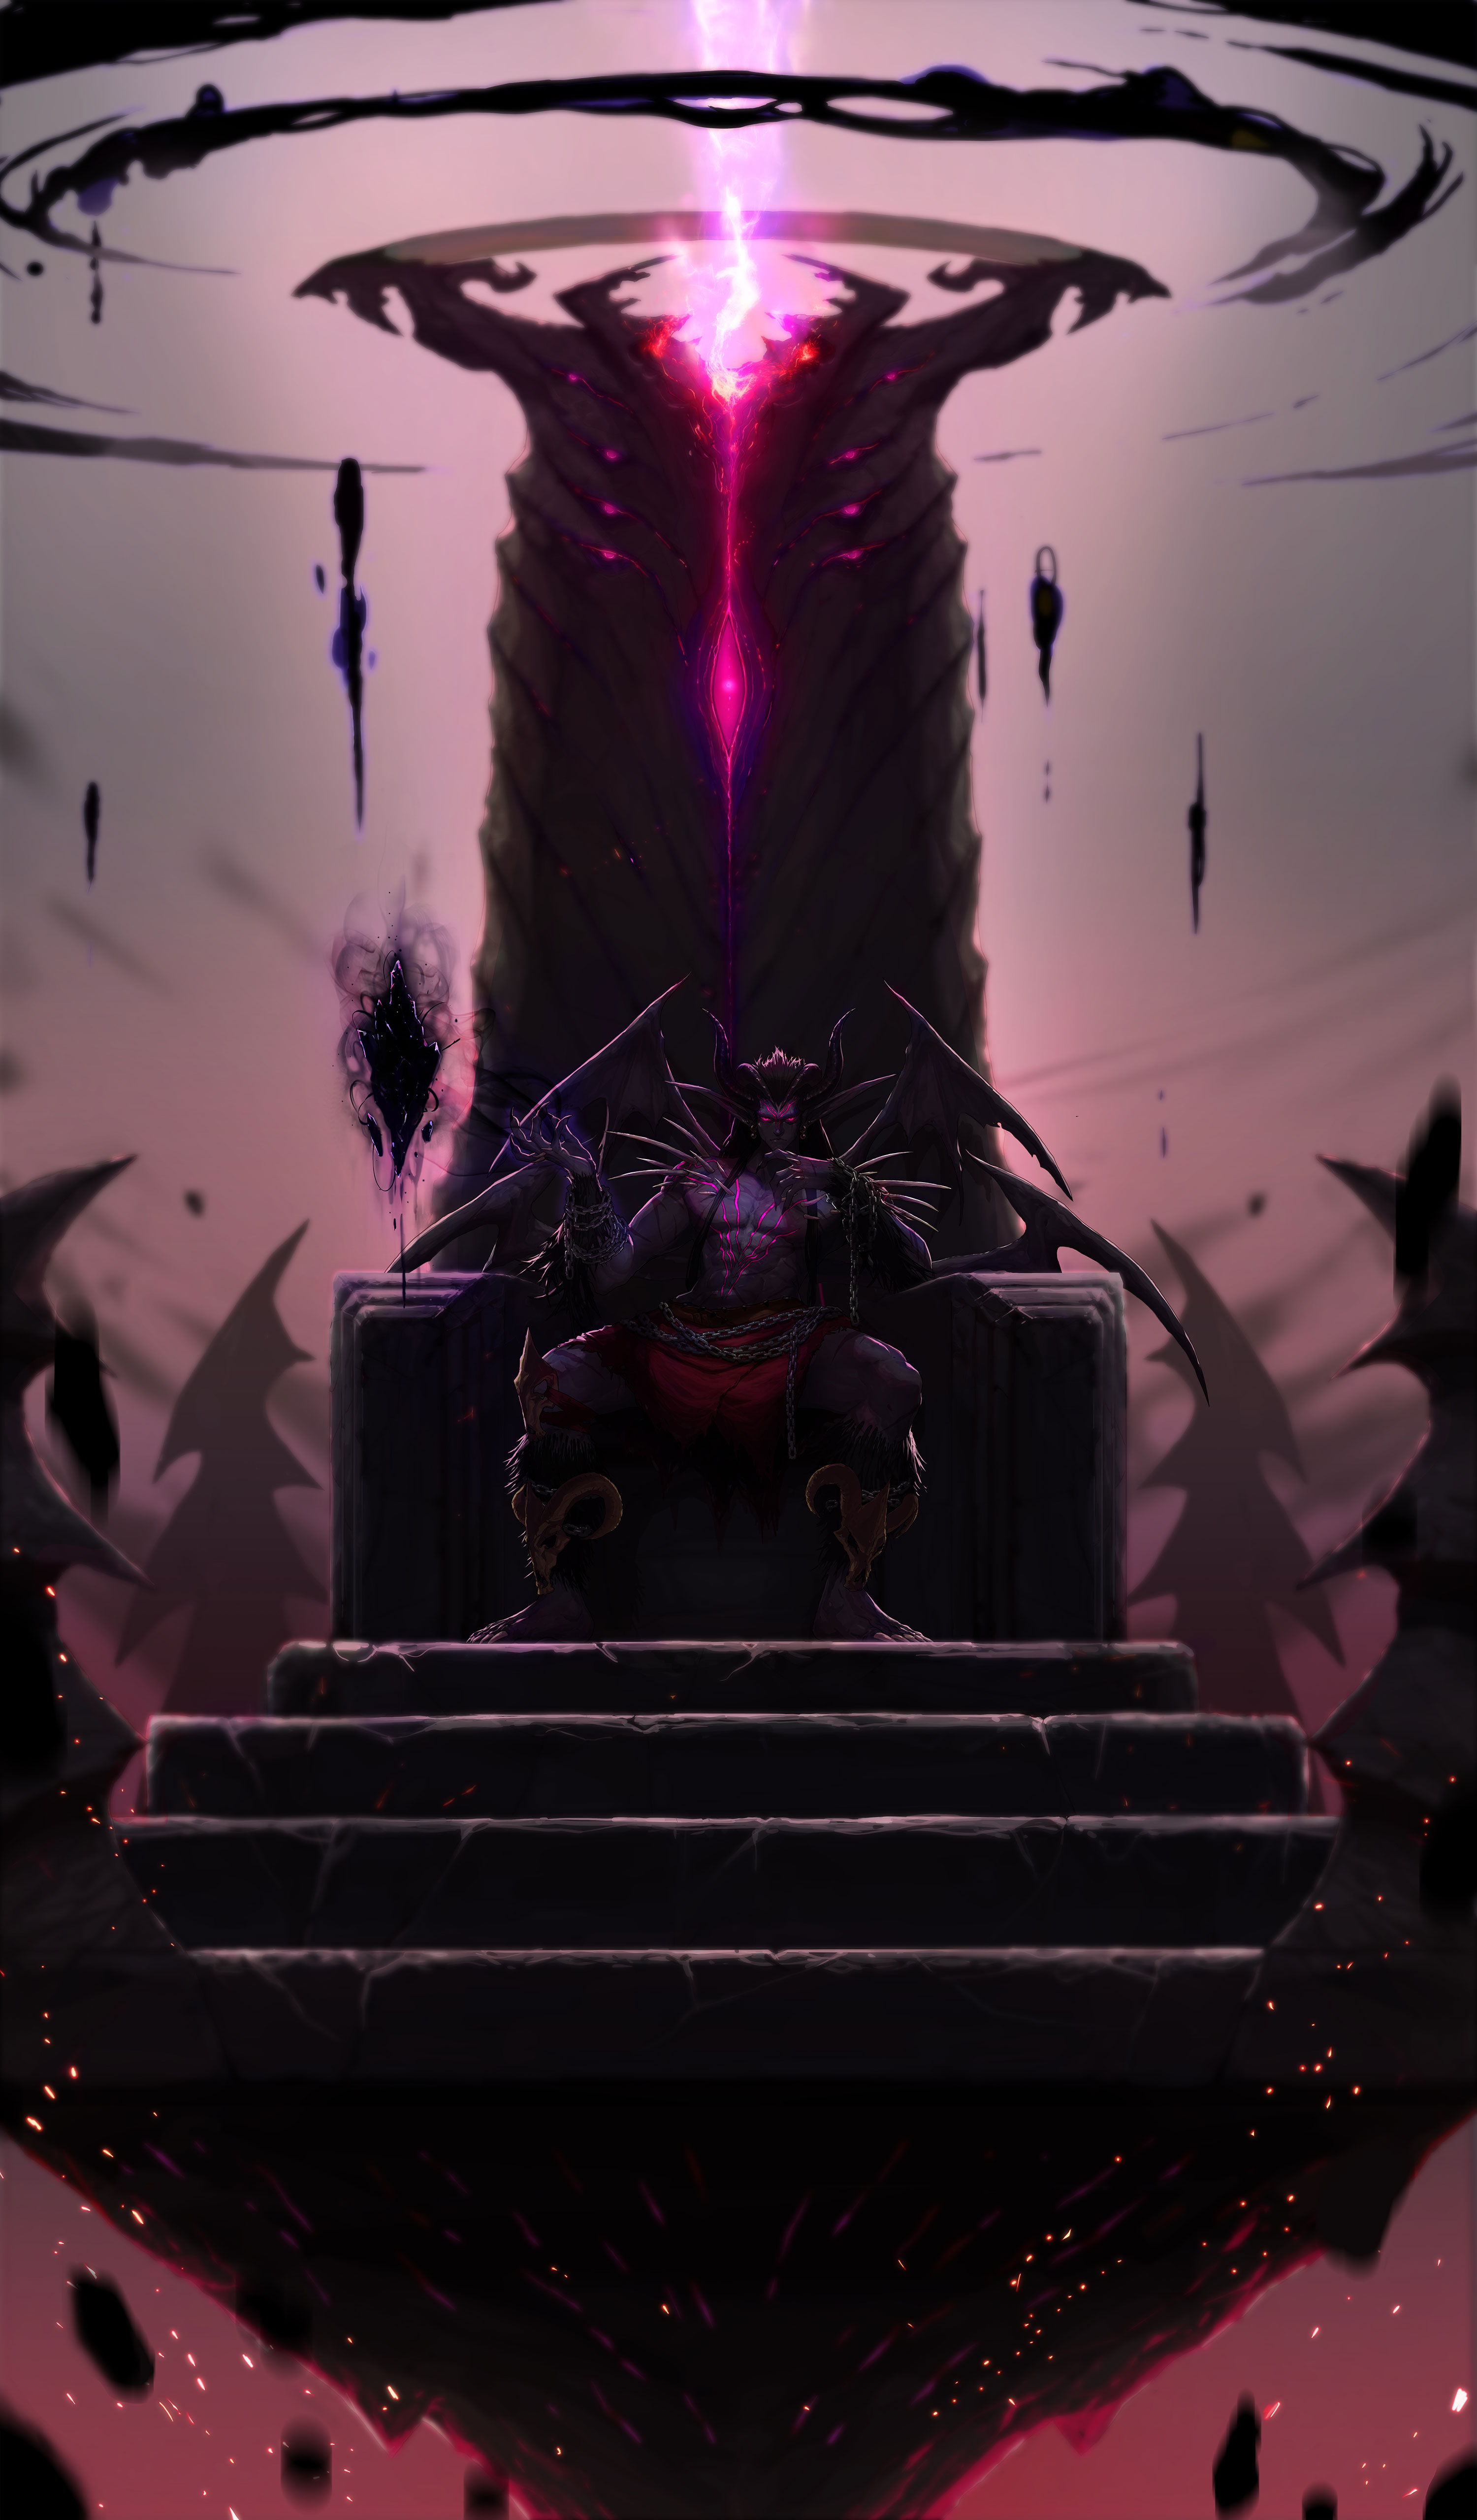
| + | * '''Black Crystal''' During the very beginning of Phase 1, Ozma summons a floating Black Crystal towards all three Raid parties in their respective sections of the Throne. Apart from only having two attack being ''Crystal Thorn'' and ''Cross Laser'' which are easily avoidable, it functions like his Otherverse skill '''Cloak of Darkness''', until the Phase 2 fight begins. | ||
| + | |||
| + | * '''Mini Meteors:''' Ozma can summon sprinkles of small meteors that scatters down at the location of players within a small explosion radius. | ||
| + | |||
| + | * '''Magic Explosions:''' Several purple or white circle spawn quickly underneath players to cause explosions on the floor. | ||
| + | |||
| + | * '''Yellow Circle:''' Ozma randomly places a yellow circle with arrows on a player. After a few seconds goes by, the circle explodes and deals potentially fatal damage to them. In order to prevent this from ocurring, have at least two or more party members stack together within that circle as a way to distribute the damage output without killing anyone. | ||
| + | |||
| + | * '''Chaos Lasers:''' A purple circle starts to grow underneath a random player. Once it finishes growing, Ozma fires down a volley of laser beams at where that circle's position is located. In Phase 2, Ozma can track down anyone by firing down four lasers, then another set in a cross-shaped pattern. | ||
| + | |||
| + | * '''Chaos Chain:''' Ozma can randomly creates a Red or Black Chain that connects to one or more party members. To break free from either colored chain, there are two different methods: | ||
| + | ** Anyone who has a '''<span style="color:red">Red Chain</span>''' on them, will get pushed away and they must stay together. | ||
| + | ** Anyone with has a '''Black Chain''' on them, will get pulled within each other and they must run away. | ||
| + | :If this is done correctly while letting the progress bar above empty out, the chains eventually disperse and those players are freed. | ||
| + | |||
| + | * '''Chaos Eye:''' In a total of three times, Ozma places an eye on everyone that flashes either a X mark or doesnt: | ||
| + | * If the eye has no X mark, look at Ozma. | ||
| + | * If the eye has a X mark, look away from Ozma. | ||
| + | :Looking the opposite way results in getting thrown into a wall and damaged. | ||
| + | |||
| + | * '''Silence Orb:''' Two orbs are randomly placed on two party members, a White Orb drains that HP and puts them in a Silence status from casting any skills, while the Purple Orbs drains Sanity. To prevent dying, these orbs can be passed around to anyone else safely before the pattern ends. Afterwards, those orbs float up to deal AoE lighting strikes. | ||
| + | |||
| + | * '''Phase 2 Transformation:''' When Ozma's HP reaches around 50%, he'll go into a invincible state where the Black Crystal cannot take anymore damage until [[Elerinon the Tragic City]] is cleared. Upon Astaros' defeat, a cutscene plays and being similar to [[Sarpoza]]'s 2nd Phase sequence, Ozma will lift up everyone, slams them down on the floor to cause a roomwide party wipe attack that is survivable by using {{Item|Quick Rebound}}. Afterwards, he'll enter his Phase 2 battle. | ||
| + | </div> | ||
| + | </div> | ||
| + | |||
| + | <div class="mw-collapsible mw-collapsed"> | ||
| + | ===Phase 2 Move Set=== | ||
| + | <div class="mw-collapsible-content"> | ||
| + | *'''Whispers of Chaos:''' A shower of Purple and White Magic Spheres rains down on the floor, and players are each given their own bar that has a green and red meter in it. To clear this pattern, everyone must consume a certain amount of White Spheres that increases the overhead gauge, and keep it within the green range, while consuming Purple Spheres decreases the gauge. If done correctly before the timer depletes, a Nen Guard is formed around that player as a safety zone to be protected by Ozma casting roomwide lightning bolts. | ||
| + | |||
| + | * '''Chaos Explosion:''' Ozma attempts to teleport at players within close range to deal a explosive wave around him, dealing heavy damage. | ||
| + | |||
| + | * '''Wing Slash:''' In a wide arc at close range, Ozma can use his wings to attack twice in a row to knock players away. | ||
| + | |||
| + | * '''Chaos Sacrifice:''' One player is given a ring of orange flames, while another has red flames with a timer gauge above them. if time runs out, the player with red flames will get flung airborne, with Ozma firing down '''Chaos Lasers''' at them, resulting in a instant kill. To prevent being damaged, they must bump into that player with orange flames, as doing this makes those red flames vanish, and gives the orange flames player a chance to use {{IconLink|Quick Rebound}} when those lasers appear. | ||
| + | |||
| + | *''' Punish & Save:''' Functioning similarly to [[Sarpoza]]'s Elemental Shield placement during his Phase 1 Berserk, ''Armageddon Strike'', Two players are randomly given a Purple or Grey shield around them and within a total of three times, a roomwide Magic Explosion of the shield bearer's matching color appears throughout the Throne's corners. For those without a shield; surviving this pattern requires to stay within a green fan-shaped safety zone behind the shield bearer to avoid taking fatal damage from the explosion. on Chaos Levels 2-3, a third player can receive a Red colored shield. | ||
| + | |||
| + | * '''Chaos Ripple:''' Ozma summons three orbs on the map, while a targeted player has three orbs above their head. Each of these orbs will send out a AoE shockwave across the Throne's section. While these can be avoided with ease, the targeted player can also do the same effect upon landing on the floor after landing. Despite doing a fair amount of damage, these shockwaves can heavily drain Sanity Gauges by 30 points if the jumps aren't timed well. | ||
| + | |||
| + | * '''The Blade refuses to hear the truth:''' Ozma's last strike. Upon reaching 5% HP, he'll go into the middle section and forms a large orb above him that not only pulls in everyone, but also uses '''Magic Explosions''', '''Mini Meteors''' and '''Chaos Chains''' to occur on all three sections of the Throne as a last resort. However, green orbs can also spawn to lower Skill Cooldowns by 30 seconds, use these as an advantage to finally take down Ozma to clear the Raid once and for all. | ||
| + | </div> | ||
| + | </div> | ||
| + | |||
| + | <div class="mw-collapsible mw-collapsed"> | ||
| + | ===<span style="color:Red">Berserk Mode</span>=== | ||
| + | <div class="mw-collapsible-content"> | ||
| + | Ozma has a total of five different berserk patterns, as each of these will only occur depending on the Phase and HP percentage he received throughout the entire fight, plus parties cannot enter Throne of Chaos until that pattern is finished. Upon clearing or surviving those patterns, Ozma gets a 10-second incapacitated time period that greatly decreases his defenses via Damage Adjustment. | ||
| + | |||
| + | * '''Good-Bad Balance:''' A series of Purple Orbs start following players around them across the Throne. Destroying one creates a whirlpool that captures anyone within its range, and they cannot break free for a while. Once the whirlpool is done, it'll spawn Black Orbs that'll cause a knock down at close contact when destroyed, and activates a lightning bolt, while both Orbs can cancel out each other's patterns upon colliding. After some time has passed, Ozma casts a room-wide lightning strike towards everyone. To survive this, players who get trapped into whirlpools can take advantage of its short invulnerability, but will need to time it correctly. | ||
| + | |||
| + | * '''Chaos' Judgment:''' The Black Crystal has five orbs located above it, alongside a purple line connected to whoever's the farthest away, while meteors fall down, followed by a larger Meteor that lands within the player's location dealing AoE damage and spawning a Tombstone. If the same player keeps being targeted, they'll have 50% of their HP drained. This pattern will repeat within a total of five times until no more orbs are on the Black Crystal. Depending on the amount of Tombstones, one or two of them will form a Nen Guard as a safety zone that protects anyone from Ozma summoning a volley of AoE room-wide Meteors. | ||
| + | |||
| + | * '''Chaos' Test:''' Three rows of Grey Crests spawns on the floor, these will turn Yellow, and creates a Nen Guard if anyone steps on one. For this pattern, everyone must locate four real Yellow Crests located within the rows, as some may turn out fake once stepped on and disappearing. While this is going, '''Magic Explosions''' appear underneath to disrupt players while doing the pattern, and after the timer ends, Ozma performs '''Annihilator'''. If playing on Chaos Level's 2–3, this pattern is heavily altered. | ||
| + | |||
| + | * '''Chaos Fragment:''' At 20 - 40% HP and being somewhat identical to [[Bloodlust Midnight's Darkness]]'s ''World of Red Dreams'', Ozma summons five orbs towards two random Raid party sections, and must unify those orbs by matching the same colors going in order; '''<span style="color:blue">Blue</span>''' --> '''<span style="color:green">Green</span>''' --> '''<span style="color:red">Red</span>''' --> '''<span style="color:goldenrod">Yellow</span>'''. Ozma's 10-second incapacitated time will only activate if both parties who received the pattern successfully cleared it. | ||
| + | |||
| + | * '''Void Space:''' At 10% HP, Ozma exiles anyone who is still alive into the Void, and must initiate a counterattack phase towards the Imposter Scapegoat, being similar to other raid bosses who have an identical gimmick. Depending on the Raid's Chaos Level, the amount of Group Counters shown below are required to escape and clear the pattern without any casualties. | ||
| + | ** '''Chaos 0:''' 30 | ||
| + | ** '''Chaos 1:''' 35 | ||
| + | ** '''Chaos 2–3:''' 40 | ||
| + | |||
| + | * '''Annihilator:''' Whenever specific berserk patterns failed, or trying to survive ones like '''Chaos' Test''', Ozma will do his own Neo: Awakening-like room-wide attack that results in an instant kill. | ||
| + | </div> | ||
| + | </div> | ||
| + | |||
| + | <div class="mw-collapsible mw-collapsed"> | ||
| + | ===Tips & Strategy=== | ||
| + | <div class="mw-collapsible-content"> | ||
| + | * Compared to his Dark Side fight in Otherverse or other Apostle-focused bosses, the Raid version of Ozma can be considered a truly dangerous final boss, especially on Chaos Levels 2 -3 as he's able to chain various hard-hitting attack patterns, alongside possessing numerous Berserks that can easily kill anyone that's uncoordinated. | ||
| + | </div> | ||
| + | </div> | ||
| + | |||
| + | ==Quotes (Raid)== | ||
| + | ====Phase 1==== | ||
| + | '''Encounter''' | ||
| + | * ??? | ||
| + | |||
| + | '''Chaos Chain''' | ||
| + | * ??? | ||
| + | |||
| + | '''Chaos Eye''' | ||
| + | * "Open your eyes, or accept your death." (On cast) | ||
| + | |||
| + | '''Silence Orb''' | ||
| + | * "Accept your fate." (On cast) | ||
| + | * "There is no denying it." (Pattern end) | ||
| + | |||
| + | '''Punish & Save''' | ||
| + | * "I'll punish and save you." | ||
| + | |||
| + | '''Chaos's Judgment''' | ||
| + | * "I'll show you mercy, and save you from the chaos." | ||
| + | |||
| + | '''Pre-Transformation''' | ||
| + | * "Resistance is futile." (If Ozma's HP reaches 50%) | ||
| + | |||
| + | '''Transformation''' | ||
| + | * ??? | ||
| + | |||
| + | ====Phase 2==== | ||
| + | '''Encounter''' | ||
| + | * ??? | ||
| + | |||
| + | '''Chaos Sacrifice''' | ||
| + | * "Who wants to sacrifice themselves?" | ||
| + | |||
| + | '''Chaos Ripple''' | ||
| + | * "I hearby declare the end of this rotton world." (On cast) | ||
| + | |||
| + | '''Void Space''' | ||
| + | * "Do you still deny your own voice?" | ||
| + | |||
| + | '''Chaos's Test''' | ||
| + | * "Can you see the truth behind the illusion?." | ||
| + | |||
| + | '''Chaos Fragment''' | ||
| + | * I've been waiting an eternity for this moment." | ||
| + | |||
| + | '''Annihilator''' | ||
| + | * "Those who defy Chaos shall be destroyed!" (Beserk pattern failure or surviving Chaos's Test) | ||
| + | |||
| + | '''Final Strike''' | ||
| + | * "Foolish. The Blade refuses to hear the truth." (5% HP) | ||
| + | |||
| + | '''Defeat''' | ||
| + | * ??? | ||
| + | |||
| + | ==Appearances== | ||
| + | {{Appears in}} | ||
== Notes == | == Notes == | ||
*Ozma of Chaos has a special conversation when fighting with Apostle Kasijas from the Summoner's [[Hired Summon: Conqueror Kasijas]] skill. An example video is shown [https://www.youtube.com/watch?v=SElSIVRWxug here]. | *Ozma of Chaos has a special conversation when fighting with Apostle Kasijas from the Summoner's [[Hired Summon: Conqueror Kasijas]] skill. An example video is shown [https://www.youtube.com/watch?v=SElSIVRWxug here]. | ||
| + | |||
| + | ==Trivia== | ||
| + | ===Etymology=== | ||
| + | * The name '''Ozma''' is of Scandinavian origins given to girls that means ''God's Protection''. | ||
| + | |||
| + | ===Concept=== | ||
| + | * His overall character motif takes inspiration from [https://castlevania.fandom.com/wiki/Dracula Vlad Tepes Dracula], the primary antagonist of the Castlevania franchise and shares a few similarites to the Vampire Lord in which: | ||
| + | ** They both originally started off as human in their past lives. | ||
| + | ** Turned against all of humanity after losing a loved one. | ||
| + | ** Both are incarnations of Chaos. | ||
| + | |||
| + | ===In-Game=== | ||
| + | * During Ozma Raid, his boss fight during Phase 1 plays out very similarly to [https://devilmaycry.fandom.com/wiki/Urizen Urizen's] Enthroned state from Devil May Cry 5 being protected by a floating crystal, while the 2nd Phase is somewhat identical with [https://www.youtube.com/watch?v=x7CKM_xfh0o Lord Deimos], the final boss for Capcom's Dungeons & Dragons: Tower of Doom. | ||
| + | * He is featured through flavor text upon his transformation on the Level 100 Heavy Armor set, [[Ruination: The Path to Hell Set|Ruination: The Path to Hell.]] | ||
| + | * His ''You be the God of Destruction; I'll be the God of Chaos'' line appears in [[Black Shrine]]'s Chamber of Secrets upon meeting certain requirements. | ||
| + | |||
| + | ===Miscellaneous=== | ||
| + | * Ozma's attire first was first availabled for the [[Male Fighter]] in a older package called [[Apostle's Descendant Avatars]], then later returned in [https://www.dfoneople.com/news/sales/Advent-of-Apostles Advent of Apostles] for [[Male Gunner]] & [[Male Mage]]. | ||
== Gallery == | == Gallery == | ||
| + | ===Sprites=== | ||
| + | [[File:Ozma of Chaos.gif|Ozma as a boss in Dark Side]] | ||
| + | [[File:Phase One Ozma Raid Sprite.gif|Ozma's Phase 1 appearance in his raid]] | ||
| + | [[File:PhaseTwo OzmaRaid.gif|Ozma's Phase 2 appearance|350px]] | ||
| + | [[File:Human Ozma.gif|Ozma as a human]] | ||
| + | |||
| + | ===Artwork=== | ||
<div class="jcarousel-wrapper"> | <div class="jcarousel-wrapper"> | ||
<div class="jcarousel jcarousel-randomize"> | <div class="jcarousel jcarousel-randomize"> | ||
| Line 104: | Line 303: | ||
<div class="jcarousel-item"> | <div class="jcarousel-item"> | ||
{{banner|image=Ozma Full Body.png|quote=Ozma's Full Body Portrait|width=150}} | {{banner|image=Ozma Full Body.png|quote=Ozma's Full Body Portrait|width=150}} | ||
| + | </div> | ||
| + | <div class="jcarousel-item"> | ||
| + | {{banner|image=Raid Ozma Throne.jpeg|quote=Ozma upon his throne|width=300}} | ||
| + | </div> | ||
| + | <div class="jcarousel-item"> | ||
| + | {{banner|image=Ozma Throne.jpeg|quote=Ozma|width=300}} | ||
| + | </div> | ||
| + | <div class="jcarousel-item"> | ||
| + | {{banner|image=Ozma Human and Apostle.jpeg|quote=Ozma|width=500}} | ||
| + | </div> | ||
| + | <div class="jcarousel-item"> | ||
| + | {{banner|image=Ozma Human Portrait.png|quote=Ozma as a human|width=500}} | ||
| + | </div> | ||
| + | <div class="jcarousel-item"> | ||
| + | {{banner|image=Ozma 2nd Phase Full Portrait.png|quote=Ozma in his second phase|width=500}} | ||
| + | </div> | ||
| + | <div class="jcarousel-item"> | ||
| + | {{banner|image=Ozma 2nd Phase Full Portrait.webm|quote=Ozma in his second phase|width=500}} | ||
</div> | </div> | ||
</div> | </div> | ||
| Line 111: | Line 328: | ||
<p class="jcarousel-pagination"></p> | <p class="jcarousel-pagination"></p> | ||
</div> | </div> | ||
| + | |||
| + | [[Category:Apostles]] | ||
| + | [[Category:Gods]] | ||
Latest revision as of 20:39, 27 July 2024
| Ozma of Chaos | |
|---|---|
| |
| Age | 42 (at the time of death) |
| Sex | Male |
| Race | Human (Former) Demon |
| Affiliation | Pelos Empire (Former) The Imposter Legion |
| Occupation | Pelos Empire Court Magician (Former) The God of Chaos The Eleventh Apostle (Korean: 第11使徒 Je Sib-il Sado) |
| Alias | Great Mage Ozma The One Who Rose from Death / The One Who Resurrected (Korean: 죽음에서 일어난 者 Jugeumeseo Ireonan Ja) |
| Location | Dark Side |
| Foreign Name(s) | Korean Ver.:
混沌의 오즈마 Hondone Ojeuma, "Ozma of Chaos" Chinese Ver.:
混沌之神奥兹玛 Hùndùn zhī shén àozīmǎ, "Ozma, the God of Chaos" Japanese Ver.:
混沌のオズマ Konton no Ozuma, "Ozma of Chaos" |
| Likeability | N/A |
| “ | Kazan... Will you become the God of Destruction? Then I will become the God of Chaos. | ” |
Ozma of Chaos (Korean: 혼돈의 오즈마 Hondone Ojeuma), also known as the God of Chaos (Korean: 혼돈의 신 Hondone Sin), is an enemy character and secondary antagonist from Dungeon Fighter Online (DFO) and Dungeon & Fighter Mobile (DNFM). In DFO, he originally served as the final boss for the now unavailable Otherverse dungeon Dark Side, and currently acts as primary antagonist of the Black Order Resurgence Arc and the final boss for the Otherworldly Dark Side dungeon Throne of Chaos. In DNFM's version of Ozma Raid, he appears with three phase variations: an angelic version known as Ozma of Creation (Korean: 창조의 오즈마 Changjoe Ojeuma), an apocalyptic version known as Ozma of Armageddon (Korean: 종말의 오즈마 Jongmare Ojeuma), and a void version known as Ozma of Nothingness (Korean: 무의 오즈마 Mue Ojeuma).
Originally a hero of the Pelos Empire from 800 years ago, he was betrayed and sentenced to death by the very people he swore to protect. He made a deal with a Reaper that transformed him into a Demon, and waged a century-long war against mankind known as the Black Crusade, which nearly wiped out the human race from Arad over 600 years ago. He is responsible for the creation of the Imposters, the Curse of Blood, and the God of Destruction, the decline and fall of the Pelos Empire, and the recent appearance of Demons on the Arad Continent as well as the indirect creation of the Priest Order, the Black Order, the Kazan Syndrome, the Avengers, and the Mistress Phenomenon.
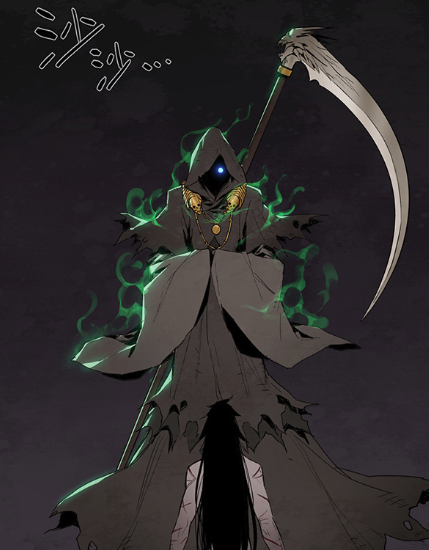
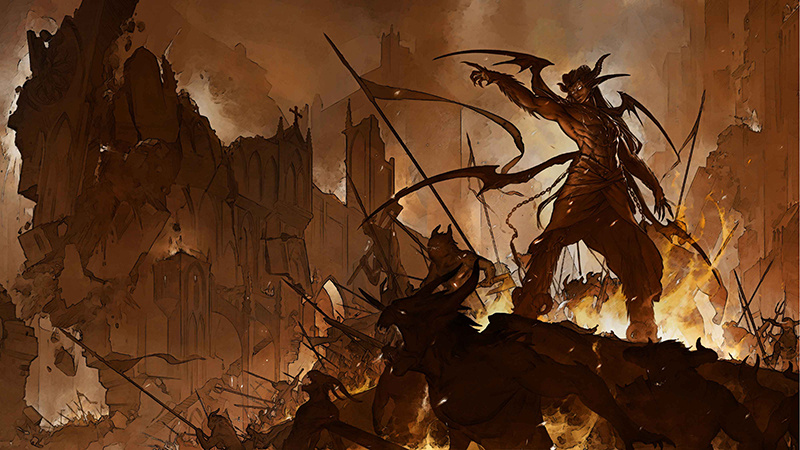
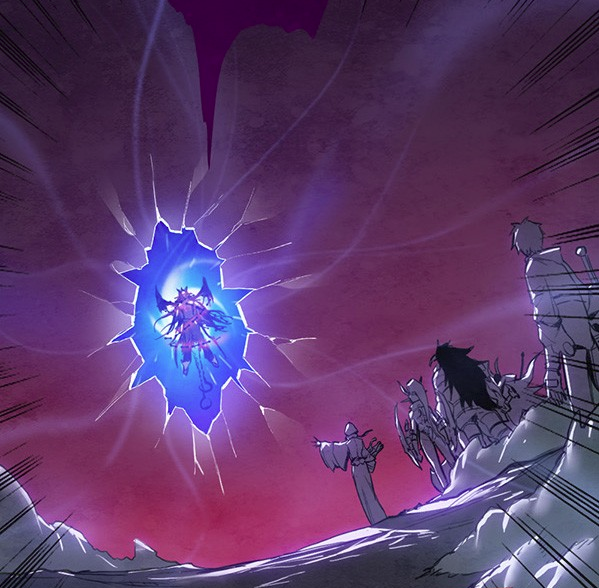
According to Aradian history, he was once a human known as the Great Mage Ozma, a magical prodigy who was raised by the Elves, once regarded as the greatest mage in the Pelos Empire. Renown for many feats, his greatest was saving the Arad Continent with his friend Great General Kazan from the Dragon invasion led by the Berserk Dragon Hismar. However, after the then Pelos Emperor framed him and Kazan for treason and sentenced them to death in an act of fear and jealousy, Ozma sold his own soul to a Reaper in exchange for the power to enact his revenge and to cleanse the world of the sins of humanity. After his execution, Ozma resurrected from death as a Demon, and with his newfound powers as the 'God of Chaos', he unleashed a plague upon the land which plunged Arad into an Age of Chaos and mustered a Demon army to eradicate mankind. During his conquest, he waged war against mankind's last alliance led by Michael of the Holy Eye, which consisted of the forces of Pelos, Suju, and the Priest Order, who ultimately defeated him and sealed him away along with his army and the entirety of Dark Side within another dimension known as the Otherverse.
Although, Ozma remains sealed for now, his presence still lingers: Imposters continue to roam the continent and signs of his seal weakening and of his resurrection become more evident with every subsequent Metastasis as increasingly more Demons arrive from the other world. It seems while trapped, Ozma still continues his campaign to eradicate mankind, readying a new army of Imposters to wage another Crusade against Arad when he escapes from his dimensional prison.
Prior to the Great Metastasis Update, Ozma initially appeared as the final enemy of Dark Side during the Priest Order's investigation of the Otherverse in the Epic Quests Once More Into the Breach, where he was revealed to be the Eleventh Apostle (Korean: 제11사도 Je Sib-il Sado) of Pandemonium, also known as The One Who Rose from Death (Korean: 죽음에서 일어난 자 Jugeumeseo Ireonan Ja). However, after the Origin Update, this reveal was changed to an unspecified time after his imprisonment and prior to the canonization of Saint Michael as an Apostle, and his reappearance would be at the finale of the Black Order Resurgence Arc.
Contents
History
More than 800 years prior to the events of the story, Ozma was once known as the greatest wizard in the Pelos Empire. In Arad Year 152, he and his friend, Pelos General Kazan, saved the world by killing the Berserk Dragon Hismar, ending his 52 year long reign of terror. The two individuals were regarded as national heroes and their strength helped bring the Pelos Empire to the peak of its power.
However as years passed, the Pelos Emperor grew paranoid and wary of their fame, believing that their power would eventually rival his own and cause him to be overthrown. It was during this time, a mysterious hooded individual arrived, and informed the Emperor of a prophecy which foretold the eminent destruction of the empire. In an attempt to avoid fate, the Emperor orchestrated a conspiracy to get rid of both Ozma and Kazan, but in doing so, sealed the Empire's demise.
In Arad Year 157, the Emperor framed Kazan for treason and sent Ozma to pursue him. While the two fought each other and became weakened, the Emperor sent another group of soldiers to capture and subdue them. The two individuals were both framed for treason, imprisoned, and tortured. The Emperor was dead set on making the two individuals lose everything. He ordered the execution of Kazan and Ozma's families as well as taking Ozma's wife Liz as a member of his concubines.
While imprisoned, Ozma felt a great betrayal for his services to the Empire and became disgusted upon seeing how quickly the people were swayed into believing the Emperor's conspiracy. As he thought to himself awaiting his eventual execution, his thoughts ventured down a dark path. Ozma had devoted himself to getting revenge and the eradication of humankind. He would bring upon the world the same sense of betrayal he experienced and let chaos reign supreme. But he had no way to do so...
It was around this time, Ozma was visited by an emissary of death, a reaper, who promised him the power he wanted in exchange for his soul. At first, Ozma turned down his offer, attempting to drive the reaper away. But as time passed, his desperation and insanity grew. Upon his execution, as he was thrown into the South Sea to die, the reaper appeared before him again and Ozma accepted his proposal. It was then, the once great wizard Ozma had died, and had given way to the newly resurrected God of Chaos.
One year later, Ozma initiated his plan and began assembling his Army of Darkness. He searched for his old friend Kazan, finding the exiled, disgraced general wandering aimlessly in the Stru Mountains barely clinging to life. Acknowledging their past friendship, Ozma released Kazan from his human form and offered him an opportunity to join his Army of Darkness. Having given up on humanity, Kazan refused his offer and the two parted ways. Kazan became the God of Destruction wandering aimlessly around the Arad Continent spreading his Kazan Syndrome while Ozma became the God of Chaos spreading his Curse of Blood and continued his pursuit to create his Army of Darkness to wipe out humanity.
Through Ozma's efforts, creatures known as Imposters began showing up in Arad. These beings were former humans who fell victim to the Curse of Blood, and were monsters that disguised themselves as humans with an insatiable bloodlust. Those who were attacked by Imposters also became Imposters. Because the Imposters were not distinguishable from normal people by the way they look, it created mistrust and witch hunts within the populace; descending the continent of Arad into chaos. Around Arad Year 211, a group of individuals known as priests began combating the growing number of Imposters and would eventually grow into a major organization. However, during these years, Ozma kept himself hidden as he amassed his Army of Darkness. It wouldn't be until Arad Year 252 when Ozma finally reappears to lead his Imposter Army.
One year later, Ozma and his Army of Darkness were challenged by a group known as the Priest Order, led by Michael of the Holy Eye, in an almost century-long struggle known as the Black Crusade. In Arad Year 347, Ozma's army became cornered in an area known as Dark Side, where he and his army were defeated and sealed in another dimension, ending the 94 year war. Although Ozma had failed in his campaign to destroy humankind, he succeeded in getting revenge against his perpetrators, and led to the destruction of the once great Pelos Empire.
While trapped, Ozma readied a new army of Imposters to wage another war upon Arad for when he would eventually escape from his dimensional prison. But he was not alone; trapped along with him was the Priest General, Michael of the Holy Eye. For centuries, the two individuals constantly clashed with one another, unable to kill each other. It wouldn't be until Arad Year 993, when the seal on dimension prison weakened, could Ozma begin sending small portions of his army, Chaos Demons, back into Arad.
Around Arad Year 1002, the Priest Order upon investigating the Chaos Demon phenomenon had discovered a demon stronghold in the Otherverse. It was at this time, his longtime adversary, Michael, had met his end to a group of adventurers exploring the Interdimensional Rift. With now nothing holding him back, Ozma prepared his army for war. However, before he could leave his dimensional prison, he was stopped by the same group of adventurers. Although he was greatly weakened from his centuries long struggle with Michael, Ozma fought against the adventurers and met his inevitable end.
Although the Priest Order and the people of Arad celebrated the death of Ozma, heavy residual effects remained. In their blind pursuit to vanquish evil, they had caused the deaths of two more Apostles, bringing Hilder's plan two steps closer into fruition. Unbeknownst to them, the inevitable destruction of Arad, loomed ever so near...
Personality
Overall
Relationships
Kazan
Quotes
- "Kazan! My friend. Remember! It's not over yet! You must survive! I will surely find you! Kazan, Kazan!"
- "Am I the villain or are you?"
- "See what loathesome creatures you truly are."
- "Let chaos reign supreme!"
- "Ahh, this brings back memories... You did not have to come all this way you know. I was on my way to find all of you, I assure you. I suppose I should thank you for saving me the effort..." ~ Ozma confronting the Adventurers
- "You have done me quite a service, killing Michael as you did. As a token of my gratitude, if you leave now, I will not kill you. Oh my, you have that defiant look in your eyes. Just remember... I gave you a chance." ~ Ozma confronting the Adventurers again
- "In the end... I wonder... was Michael right about me? Does my death hasten the end of your world...? Answer me, Michael...!! Kazan... Ah, Kazan... This is hardly fair... You are the only one who could understand me... No... Not... Like this...! Please... do not take me like this...!! Kazan..." ~ Ozma defeated by the Adventurers Ozma's final words.
Related Pages
As an Enemy (Otherverse)
- Ozma originally made his first boss debut inside of the Otherverse's Dark Side, this dungeon has been removed upon the Global Client's arrival of Season 6.
Dark Side Attacks & Guide
- Ozma sends out slow moving dark fireball projectiles to hit players.
- If a player stands in the same place for more than 1~2 seconds, Ozma summons a small pillar of dark flame under him/her that deals large multi-hit damage and hitstun to players upon contact. Inflicts confusion and slow.
- Cloak of Darkness: Causes Ozma to be immune to damage. Can be taken away temporarily after being hit by multiple attacks, causing Ozma to be susceptible to damage.
- Aura of Betrayal: Ozma sends out a pillar of dark energy transforming one of the four players into Skewer. During this phase, all party members attacks and skills harm one another while in the betrayal state. The Skewer player must attack the other party members with the Aura of Betrayal skill (default hotkey: S) to lift the curse.
- Dimensional Breakaway: Ozma sends out a pillar of dark energy transforming one of the four players into a Sawtooth. During this phase, Ozma will constantly teleport players around the map. The Sawtooth player must cast Space Restoration skill (default hotkey: S) near Ozma multiple times to lift the curse.
- Exchanging Sights:Ozma sends out a pillar of dark energy transforming two party members into a Scissorhands and Finthers, respectively. During this phase, players will be blinded and have obstructed vision. The Scissorhands player must cast Exchange Sights skill (Default hotkey: S) to remove the blind and obstructed vision. The Finthers player can instantly remove Cloak of Darkness with the special skill (Default hotkey: A).
Strategy
- Gimmick: Ozma is immune to damage until his Cloak of Darkness is temporarily disabled. Ozma will be in an immobilized super armor state when vulnerable. Using any grabbing moves or immobilizing moves will renew his Cloak of Darkness.
- Gimmick: Ozma can transform all party members into the four different types of monsters located in Black Crusade and Dark Side. Depending on which monster the player turns into he/she has a role that needs to be fulfilled to prevent the other party members from taking damage depending on if Ozma casts Aura of Betrayal, Dimensional Breakaway, or Exchanging Sights.
- Be aware of each monster's role and that monsters and teammates can attack one another. Team communication and using each monster's skill at the right time are the keys to success, otherwise the all party members will suffer from the persistent effects after the phase is over and take unnecessary damage.
Rewards (Dark Side)
Priest Weapons
 Tainted Dimensional Scythe: Monk in Dark Side (Normal, Expert, Master)
 Tainted Dimensional Scythe: Exorcist in Dark Side (Normal, Expert, Master)
 Tainted Dimensional Scythe - Avenger in Dark Side (Normal, Expert, Master)
 Unlimited Ability Scythe - Monk in Dark Side (Expert, Master)
 Combo Breaker Scythe - Exorcist in Dark Side (Expert, Master)
 Protection of Death Scythe - Avenger in Dark Side (Expert, Master)
As an Enemy (Ozma Raid)
Phase 1 Move Set
- Black Crystal During the very beginning of Phase 1, Ozma summons a floating Black Crystal towards all three Raid parties in their respective sections of the Throne. Apart from only having two attack being Crystal Thorn and Cross Laser which are easily avoidable, it functions like his Otherverse skill Cloak of Darkness, until the Phase 2 fight begins.
- Mini Meteors: Ozma can summon sprinkles of small meteors that scatters down at the location of players within a small explosion radius.
- Magic Explosions: Several purple or white circle spawn quickly underneath players to cause explosions on the floor.
- Yellow Circle: Ozma randomly places a yellow circle with arrows on a player. After a few seconds goes by, the circle explodes and deals potentially fatal damage to them. In order to prevent this from ocurring, have at least two or more party members stack together within that circle as a way to distribute the damage output without killing anyone.
- Chaos Lasers: A purple circle starts to grow underneath a random player. Once it finishes growing, Ozma fires down a volley of laser beams at where that circle's position is located. In Phase 2, Ozma can track down anyone by firing down four lasers, then another set in a cross-shaped pattern.
- Chaos Chain: Ozma can randomly creates a Red or Black Chain that connects to one or more party members. To break free from either colored chain, there are two different methods:
- Anyone who has a Red Chain on them, will get pushed away and they must stay together.
- Anyone with has a Black Chain on them, will get pulled within each other and they must run away.
- If this is done correctly while letting the progress bar above empty out, the chains eventually disperse and those players are freed.
- Chaos Eye: In a total of three times, Ozma places an eye on everyone that flashes either a X mark or doesnt:
- If the eye has no X mark, look at Ozma.
- If the eye has a X mark, look away from Ozma.
- Looking the opposite way results in getting thrown into a wall and damaged.
- Silence Orb: Two orbs are randomly placed on two party members, a White Orb drains that HP and puts them in a Silence status from casting any skills, while the Purple Orbs drains Sanity. To prevent dying, these orbs can be passed around to anyone else safely before the pattern ends. Afterwards, those orbs float up to deal AoE lighting strikes.
- Phase 2 Transformation: When Ozma's HP reaches around 50%, he'll go into a invincible state where the Black Crystal cannot take anymore damage until Elerinon the Tragic City is cleared. Upon Astaros' defeat, a cutscene plays and being similar to Sarpoza's 2nd Phase sequence, Ozma will lift up everyone, slams them down on the floor to cause a roomwide party wipe attack that is survivable by using
 Quick Rebound. Afterwards, he'll enter his Phase 2 battle.
Phase 2 Move Set
- Whispers of Chaos: A shower of Purple and White Magic Spheres rains down on the floor, and players are each given their own bar that has a green and red meter in it. To clear this pattern, everyone must consume a certain amount of White Spheres that increases the overhead gauge, and keep it within the green range, while consuming Purple Spheres decreases the gauge. If done correctly before the timer depletes, a Nen Guard is formed around that player as a safety zone to be protected by Ozma casting roomwide lightning bolts.
- Chaos Explosion: Ozma attempts to teleport at players within close range to deal a explosive wave around him, dealing heavy damage.
- Wing Slash: In a wide arc at close range, Ozma can use his wings to attack twice in a row to knock players away.
- Chaos Sacrifice: One player is given a ring of orange flames, while another has red flames with a timer gauge above them. if time runs out, the player with red flames will get flung airborne, with Ozma firing down Chaos Lasers at them, resulting in a instant kill. To prevent being damaged, they must bump into that player with orange flames, as doing this makes those red flames vanish, and gives the orange flames player a chance to use
 Quick Rebound when those lasers appear.
- Punish & Save: Functioning similarly to Sarpoza's Elemental Shield placement during his Phase 1 Berserk, Armageddon Strike, Two players are randomly given a Purple or Grey shield around them and within a total of three times, a roomwide Magic Explosion of the shield bearer's matching color appears throughout the Throne's corners. For those without a shield; surviving this pattern requires to stay within a green fan-shaped safety zone behind the shield bearer to avoid taking fatal damage from the explosion. on Chaos Levels 2-3, a third player can receive a Red colored shield.
- Chaos Ripple: Ozma summons three orbs on the map, while a targeted player has three orbs above their head. Each of these orbs will send out a AoE shockwave across the Throne's section. While these can be avoided with ease, the targeted player can also do the same effect upon landing on the floor after landing. Despite doing a fair amount of damage, these shockwaves can heavily drain Sanity Gauges by 30 points if the jumps aren't timed well.
- The Blade refuses to hear the truth: Ozma's last strike. Upon reaching 5% HP, he'll go into the middle section and forms a large orb above him that not only pulls in everyone, but also uses Magic Explosions, Mini Meteors and Chaos Chains to occur on all three sections of the Throne as a last resort. However, green orbs can also spawn to lower Skill Cooldowns by 30 seconds, use these as an advantage to finally take down Ozma to clear the Raid once and for all.
Berserk Mode
Ozma has a total of five different berserk patterns, as each of these will only occur depending on the Phase and HP percentage he received throughout the entire fight, plus parties cannot enter Throne of Chaos until that pattern is finished. Upon clearing or surviving those patterns, Ozma gets a 10-second incapacitated time period that greatly decreases his defenses via Damage Adjustment.
- Good-Bad Balance: A series of Purple Orbs start following players around them across the Throne. Destroying one creates a whirlpool that captures anyone within its range, and they cannot break free for a while. Once the whirlpool is done, it'll spawn Black Orbs that'll cause a knock down at close contact when destroyed, and activates a lightning bolt, while both Orbs can cancel out each other's patterns upon colliding. After some time has passed, Ozma casts a room-wide lightning strike towards everyone. To survive this, players who get trapped into whirlpools can take advantage of its short invulnerability, but will need to time it correctly.
- Chaos' Judgment: The Black Crystal has five orbs located above it, alongside a purple line connected to whoever's the farthest away, while meteors fall down, followed by a larger Meteor that lands within the player's location dealing AoE damage and spawning a Tombstone. If the same player keeps being targeted, they'll have 50% of their HP drained. This pattern will repeat within a total of five times until no more orbs are on the Black Crystal. Depending on the amount of Tombstones, one or two of them will form a Nen Guard as a safety zone that protects anyone from Ozma summoning a volley of AoE room-wide Meteors.
- Chaos' Test: Three rows of Grey Crests spawns on the floor, these will turn Yellow, and creates a Nen Guard if anyone steps on one. For this pattern, everyone must locate four real Yellow Crests located within the rows, as some may turn out fake once stepped on and disappearing. While this is going, Magic Explosions appear underneath to disrupt players while doing the pattern, and after the timer ends, Ozma performs Annihilator. If playing on Chaos Level's 2–3, this pattern is heavily altered.
- Chaos Fragment: At 20 - 40% HP and being somewhat identical to Bloodlust Midnight's Darkness's World of Red Dreams, Ozma summons five orbs towards two random Raid party sections, and must unify those orbs by matching the same colors going in order; Blue --> Green --> Red --> Yellow. Ozma's 10-second incapacitated time will only activate if both parties who received the pattern successfully cleared it.
- Void Space: At 10% HP, Ozma exiles anyone who is still alive into the Void, and must initiate a counterattack phase towards the Imposter Scapegoat, being similar to other raid bosses who have an identical gimmick. Depending on the Raid's Chaos Level, the amount of Group Counters shown below are required to escape and clear the pattern without any casualties.
- Chaos 0: 30
- Chaos 1: 35
- Chaos 2–3: 40
- Annihilator: Whenever specific berserk patterns failed, or trying to survive ones like Chaos' Test, Ozma will do his own Neo: Awakening-like room-wide attack that results in an instant kill.
Tips & Strategy
- Compared to his Dark Side fight in Otherverse or other Apostle-focused bosses, the Raid version of Ozma can be considered a truly dangerous final boss, especially on Chaos Levels 2 -3 as he's able to chain various hard-hitting attack patterns, alongside possessing numerous Berserks that can easily kill anyone that's uncoordinated.
Quotes (Raid)
Phase 1
Encounter
- ???
Chaos Chain
- ???
Chaos Eye
- "Open your eyes, or accept your death." (On cast)
Silence Orb
- "Accept your fate." (On cast)
- "There is no denying it." (Pattern end)
Punish & Save
- "I'll punish and save you."
Chaos's Judgment
- "I'll show you mercy, and save you from the chaos."
Pre-Transformation
- "Resistance is futile." (If Ozma's HP reaches 50%)
Transformation
- ???
Phase 2
Encounter
- ???
Chaos Sacrifice
- "Who wants to sacrifice themselves?"
Chaos Ripple
- "I hearby declare the end of this rotton world." (On cast)
Void Space
- "Do you still deny your own voice?"
Chaos's Test
- "Can you see the truth behind the illusion?."
Chaos Fragment
- I've been waiting an eternity for this moment."
Annihilator
- "Those who defy Chaos shall be destroyed!" (Beserk pattern failure or surviving Chaos's Test)
Final Strike
- "Foolish. The Blade refuses to hear the truth." (5% HP)
Defeat
- ???
Appearances
- Throne of Chaos (Dungeon) (Boss)
Notes
- Ozma of Chaos has a special conversation when fighting with Apostle Kasijas from the Summoner's Hired Summon: Conqueror Kasijas skill. An example video is shown here.
Trivia
Etymology
- The name Ozma is of Scandinavian origins given to girls that means God's Protection.
Concept
- His overall character motif takes inspiration from Vlad Tepes Dracula, the primary antagonist of the Castlevania franchise and shares a few similarites to the Vampire Lord in which:
- They both originally started off as human in their past lives.
- Turned against all of humanity after losing a loved one.
- Both are incarnations of Chaos.
In-Game
- During Ozma Raid, his boss fight during Phase 1 plays out very similarly to Urizen's Enthroned state from Devil May Cry 5 being protected by a floating crystal, while the 2nd Phase is somewhat identical with Lord Deimos, the final boss for Capcom's Dungeons & Dragons: Tower of Doom.
- He is featured through flavor text upon his transformation on the Level 100 Heavy Armor set, Ruination: The Path to Hell.
- His You be the God of Destruction; I'll be the God of Chaos line appears in Black Shrine's Chamber of Secrets upon meeting certain requirements.
Miscellaneous
- Ozma's attire first was first availabled for the Male Fighter in a older package called Apostle's Descendant Avatars, then later returned in Advent of Apostles for Male Gunner & Male Mage.

