Welcome to the DFO World Wiki. With many major updates since the release of DFO, many items are missing. Visit Item Database Project to learn more.
Please remember to click "show preview" before saving the page.
Thanks for the updated logo snafuPop!
Difference between revisions of "Berserk Dragon Hismar"
NoirGraves (talk | contribs) m |
NoirGraves (talk | contribs) |
||
| Line 3: | Line 3: | ||
|Icon= | |Icon= | ||
|Name=Berserk Dragon Hismar | |Name=Berserk Dragon Hismar | ||
| − | |Image=[[File:Hismar-NFace1.png| | + | |Image=[[File:Hismar-NFace1.png|350px]] |
|Age= Unknown | |Age= Unknown | ||
|Sex=Male | |Sex=Male | ||
| Line 11: | Line 11: | ||
}} | }} | ||
| − | The '''Berserk Dragon Hismar''' (<u>Korean</u>: 광룡 히스마) is one of the three Great Dragons that the Apostle [[Bakal]] sent down to the Arad Continent. He was defeated long before the events of the story by the [[Pelos Empire]] heroes [[Ozma]] and [[Kazan (Character)|Kazan]]. Known for his violent and cruel nature, | + | The '''Berserk Dragon Hismar''' (<u>Korean</u>: 광룡 히스마) is one of the three Great Dragons that the Apostle [[Bakal]] sent down to the Arad Continent. He was defeated long before the events of the story by the [[Pelos Empire]] heroes [[Ozma]] and [[Kazan (Character)|Kazan]]. Known for his violent and cruel nature, |
Although the adult version of Hismar cannot be combated in-game prior to [[The Machine Revolution]], a younger version of [[Young Hismar|himself]] can be fought in the dungeon [[Naissance]] in the region [[Time Gate]]. | Although the adult version of Hismar cannot be combated in-game prior to [[The Machine Revolution]], a younger version of [[Young Hismar|himself]] can be fought in the dungeon [[Naissance]] in the region [[Time Gate]]. | ||
| Line 18: | Line 18: | ||
==Lore== | ==Lore== | ||
| − | '' | + | <small><blockquote>'''Profile (Original History):''' |
| + | <i><p>The first of the three dragon children of Bakal that were sent down to the Arad continent.<br> | ||
| + | <p>It took the other dragons to the Underworld to conquer it for its father, and terrorized the Pelos Empire.<br> | ||
| + | <p>It was eventually subjugated by Pelos' heroes, Kazan and Ozma.<br> | ||
| + | <ref> https://www.dnf-universe.com/story/NlRy63OB6Yvp DFU Profile - Beserk Dragon Hismar </ref> | ||
| + | </blockquote></small></i> | ||
| + | <hr> | ||
| + | <small><blockquote>'''The Machine Revolution Story:''' | ||
| + | <i><p>Kwaarrgggh!<br> | ||
| + | |||
| + | <p>Berserk Dragon Hismar, the one with the strongest body among the three dragons created by Bakal, roared out. | ||
| + | The tiles on which the floor Hismar sat trembled dangerously, | ||
| + | and on the earth and the walls were huge scratches left by his claws. | ||
| + | The ground moaned with a painful crack as it gradually got distorted, unable to withstand the dragon's power.<br> | ||
| + | |||
| + | <p>"How splendid that sound is. That's the perfect morning bugle for the soldiers. Hah hah!"<br> | ||
| + | |||
| + | <p>Oscar, his arms still folded, looked in Hismar's direction and laughed. | ||
| + | They were standing on a peak far from Bakal's palace and high enough to look down upon it. | ||
| + | The distance was so great that the palace almost seemed like a dot, but they could clearly hear the grumbling noise from the ground as if they were right there.<br> | ||
| + | <p>Juvenil lowered the binoculars from his eyes and replied.<br> | ||
| + | |||
| + | <p>"I assume that thing fights, just by using the pure physical force from its astonishing body."<br> | ||
| + | |||
| + | <p>"Hah hah! Indeed. According to Sarah, even the pluckiest dragons dare not approach the Berserk Dragon's Destroyed Palace.<br> | ||
| + | <p>She also said that the thing's got quite a temper. Once it starts going wild, it never stops until everything around is destroyed."<br> | ||
| + | |||
| + | <p>"I wonder how such a violent thing can stay in Bakal's palace without causing any trouble."<br> | ||
| + | |||
| + | <p>Oscar was about to answer Juvenil's question but paused with a frown.<br> | ||
| + | <p>The Berserk Dragon roared again, louder than the last time.<br> | ||
| + | <p>He felt like his eardrums were getting torn, even though he was wearing ear-protection equipment.<br> | ||
| + | <p>The roar was terrifying enough to make the weak-willed freeze up and tremble on the spot.<br> | ||
| + | |||
| + | <p>"That's just how loyal he is to Bakal."<br> | ||
| + | |||
| + | <p>Oscar stared at Juvenil's face.<br> | ||
| + | <p>Perhaps because of the setting sun's glow, he looked even more grim and resolute than usual.<br> | ||
| + | |||
| + | <p>"Planning to stay a little longer?"<br> | ||
| + | |||
| + | <p>"Go ahead, old man. I'll watch him some more before going down."<br> | ||
| + | |||
| + | <p>Oscar nodded and slowly descended the mountain, leaving behind Juvenil, who was deep in thought.<br> | ||
| + | <ref> https://www.dfoneople.com/news/updates/3258/The-Machine-Revolution:-Total-War/Story/Monsters The Machine Revolution: Story Monsters </ref> | ||
| + | </blockquote></small> | ||
| + | <hr></i> | ||
== History == | == History == | ||
| Line 55: | Line 101: | ||
'''Phases 1 ~ 2''' <br> | '''Phases 1 ~ 2''' <br> | ||
| − | * ''' | + | * '''Berserk Gauge:''' During the beginning of Hismar's Raid fight, everyone is given their own '''<span style="color:goldenrod">Berserk Gauge</span>''' which functions similarly to his '''Weak Spots''' pattern. But instead of picking up scales, the gauge itself will only increase whenever any of Hismar's patterns occur within yellow intersections outlined, that offers an increase towards both incoming and outgoing damage through accumulation by five stacks if anyone's standing inside those sections. Once the gauge becomes maxed out, it offers a 30% cooldown reduction buff to skills. |
* '''Thorn Bush:''' At certain intervals, Hismar drops these thorn bushes above everyone's head throughout the room that shows a red circle beneath them. While these may deal minimal damage at first through contact, they'll become very dangerous if anyone has accumulated higher stacks of their '''Madness Gauge'''. | * '''Thorn Bush:''' At certain intervals, Hismar drops these thorn bushes above everyone's head throughout the room that shows a red circle beneath them. While these may deal minimal damage at first through contact, they'll become very dangerous if anyone has accumulated higher stacks of their '''Madness Gauge'''. | ||
* '''<span style="color:red">Berserk</span>''' | * '''<span style="color:red">Berserk</span>''' | ||
| − | ** '''Berserk Dragon Cry:''' He'll get into the middle section and begins roaring with a timer casting | + | ** '''Berserk Dragon Cry:''' He'll get into the middle section and begins roaring with a timer casting bar below, similar to his '''Earth Tremor''' pattern in Total War, instead this will actually increase everyone's '''<span style="color:goldenrod">Berserk Gauge</span>''' leaving him vulnerable to counter-attacks while in the same room. This is an opportunity for the party fighting him to deal any type of burst damage towards Hismar and get him into at least 50% of his HP to activate Phase 2 before the bar fills up completely. There is a portal that goes right towards the next room, as it is mandatory for everyone to escape before the pattern finishes, resulting in a instant-kill. |
| − | His Phase 2 | + | :His Phase 2 Berserk on the other hand, is much different where he'll launch out a series of tremors underneath the ground that can be avoided through jumping over those indicators, until a green circle is highlighted, showing a safe spot to avoid his body slam which is also an instant-kill on hit. Afterwards, he'll become groggy for several seconds. |
===Notes & Strategy=== | ===Notes & Strategy=== | ||
| Line 68: | Line 114: | ||
* If choosing not to defeat Rotund that nullifies his Sphere Effect in Total War, Hismar's damage output can be quite fatal during his fight. | * If choosing not to defeat Rotund that nullifies his Sphere Effect in Total War, Hismar's damage output can be quite fatal during his fight. | ||
* His Neutralize Gauge can be quickly broken through '''Weak Spots''' whenever he performs any of his patterns. | * His Neutralize Gauge can be quickly broken through '''Weak Spots''' whenever he performs any of his patterns. | ||
| − | * Depending on the party's overall strength | + | * Before facing Hismar in Bakal Raid, is it highly recommended for parties to collect buffs that offers an extra boost in damage towards him, but also granting immunity to the '''Thunderous Breath''' effect that contains {{IconLink|Stun (Status)}}. |
| + | * Depending on the party's overall strength for Hismar's Total War fight, most often opt to wither down his HP during Phase 1, and then burst him down after for Phase 2 begins. So have either the Crusaders/Enchantress/Muse deploy their respective Awakenings; {{IconLink|Apocalypse}}/{{IconLink|Final Judgment}}, {{IconLink|Crux of Victoria}}/{{IconLink|Laus di Angelus}}, {{IconLink|Marionette}}/{{IconLink|Curtain Call}} {{IconLink|On the Stage}}/{{IconLink|Finale: Special Story}} and use your strongest skills. | ||
<div class="mw-collapsible mw-collapsed"> | <div class="mw-collapsible mw-collapsed"> | ||
| Line 124: | Line 171: | ||
* "I'll crush you!" | * "I'll crush you!" | ||
* "You weaklings!" | * "You weaklings!" | ||
| + | |||
| + | '''Berserk Dragon Cry''' | ||
| + | * "This is your burial site!" (Preparing to roar) | ||
| + | |||
| + | '''Defeat''' | ||
| + | * "My roaring voice will remain to help my king!" (Bakal Raid defeat) | ||
==Appearances== | ==Appearances== | ||
| Line 130: | Line 183: | ||
==Trivia== | ==Trivia== | ||
===Etymology=== | ===Etymology=== | ||
| − | * Hismar's name could be derived from the Sanskrit '''Hisar''' (हिसार), which translate to ''Fortress'', | + | * Hismar's name could be derived from the Sanskrit '''Hisar''' (हिसार), which translate to ''Fortress'', that could befit him for being the more physically imposing of the Great Dragons. |
== Gallery == | == Gallery == | ||
Revision as of 12:06, 3 November 2023

|
Seria says: "Nothing should be as mysterious as I am!"
Some info is missing, please help to provide it if you can. |
| Berserk Dragon Hismar | |
|---|---|
| |
| Age | Unknown |
| Sex | Male |
| Race | Dragon |
| Affiliation | Bakal, Great Dragon Trio |
| Occupation | N/A |
| Alias | N/A |
| Location | Pelos Empire (Original History) Berserk Dragon's Destroyed Palace (Distorted History) |
| Foreign Name(s) | N/A |
| Likeability | N/A |
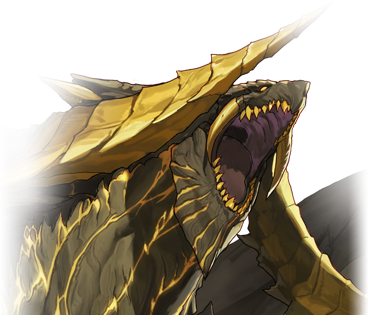
The Berserk Dragon Hismar (Korean: 광룡 히스마) is one of the three Great Dragons that the Apostle Bakal sent down to the Arad Continent. He was defeated long before the events of the story by the Pelos Empire heroes Ozma and Kazan. Known for his violent and cruel nature,
Although the adult version of Hismar cannot be combated in-game prior to The Machine Revolution, a younger version of himself can be fought in the dungeon Naissance in the region Time Gate.
It is rumored, even long after his death, his roars can still be heard across the continent in the form of the item, ![]() Berserk Dragon Cry.
Berserk Dragon Cry.
Contents
[hide]Lore
Profile (Original History):
The first of the three dragon children of Bakal that were sent down to the Arad continent.
It took the other dragons to the Underworld to conquer it for its father, and terrorized the Pelos Empire.
It was eventually subjugated by Pelos' heroes, Kazan and Ozma.
[1]
The Machine Revolution Story:
Kwaarrgggh!
Berserk Dragon Hismar, the one with the strongest body among the three dragons created by Bakal, roared out. The tiles on which the floor Hismar sat trembled dangerously, and on the earth and the walls were huge scratches left by his claws. The ground moaned with a painful crack as it gradually got distorted, unable to withstand the dragon's power.
"How splendid that sound is. That's the perfect morning bugle for the soldiers. Hah hah!"
Oscar, his arms still folded, looked in Hismar's direction and laughed. They were standing on a peak far from Bakal's palace and high enough to look down upon it. The distance was so great that the palace almost seemed like a dot, but they could clearly hear the grumbling noise from the ground as if they were right there.
Juvenil lowered the binoculars from his eyes and replied.
"I assume that thing fights, just by using the pure physical force from its astonishing body."
"Hah hah! Indeed. According to Sarah, even the pluckiest dragons dare not approach the Berserk Dragon's Destroyed Palace.
She also said that the thing's got quite a temper. Once it starts going wild, it never stops until everything around is destroyed."
"I wonder how such a violent thing can stay in Bakal's palace without causing any trouble."
Oscar was about to answer Juvenil's question but paused with a frown.
The Berserk Dragon roared again, louder than the last time.
He felt like his eardrums were getting torn, even though he was wearing ear-protection equipment.
The roar was terrifying enough to make the weak-willed freeze up and tremble on the spot.
"That's just how loyal he is to Bakal."
Oscar stared at Juvenil's face.
Perhaps because of the setting sun's glow, he looked even more grim and resolute than usual.
"Planning to stay a little longer?"
"Go ahead, old man. I'll watch him some more before going down."
Oscar nodded and slowly descended the mountain, leaving behind Juvenil, who was deep in thought.
[2]
History
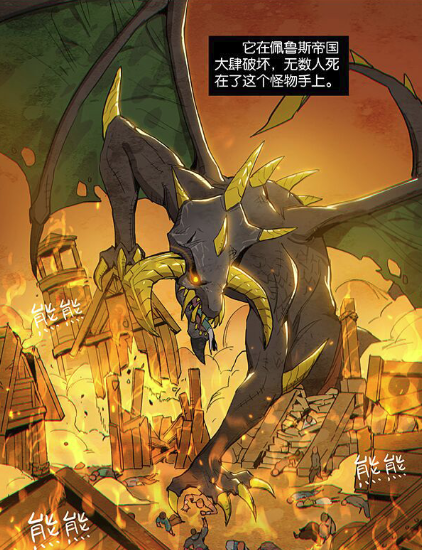
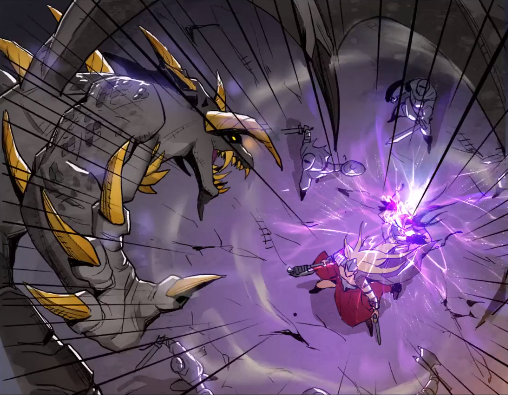
In Arad Year 100, Hismar was transferred to the Arad Continent by the Dragon Tyrant Bakal to strengthen the races of Arad. Upon his arrival, the Berserk Dragon attacked the Pelos Empire, laying waste to its surroundings with its powerful roars. In response to the attack, the Empire launched a campaign to oust the dragon from the land.
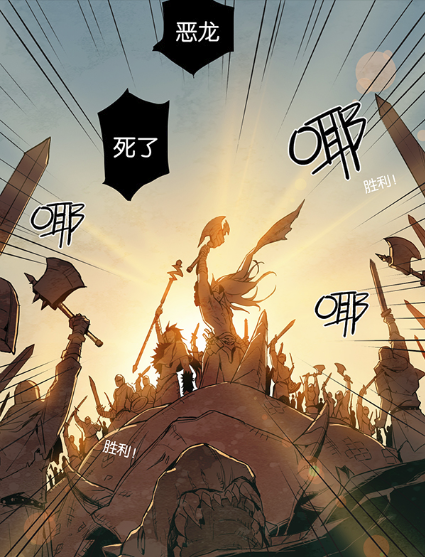
In Arad Year 152, the Empire's strongest wizard and general, Ozma and Kazan, led an attack to kill the dragon. After a long and fierce battle, the two succeeded. The resulting struggle brought glory to heroes and brought the Pelos Empire to new heights.
As an Enemy
- Type


- Family
- Dragon
Move Set (Total War)
Phases 1 ~ 2
- Frenzy: During the start of Hismar's battle through both phases, there is a Frenzy Gauge under his HP that slowly fills up between 1 ~ 2% while attacking players, 15% if any of his Weak Spots are hit. Once the gauge hits 100%, he'll become angry as his attacks are stronger, faster and begins a series of chaining various AoE-specific patterns that mainly involves: Tail Swing, Head Charge, Claw Slam, and Berserk Roar. Once the Frenzy Gauge empties out back to 0%, Hismar goes groggy for a few seconds, before resuming his attacks.
- Earth Tremor: Similar to Itrenok's pattern from Ispins, Hismar can rupture the ground through a series of Body or Claw Slams. But unlike the Green Dragon's pattern, Hismar's version does offer somewhat a safe-zone within a red circle's middle section after a 2-3 second delay.
- Weak Spots: (Hismar's Anger can be felt.|Outgoing Damage +20% |Movement Speed +150%|Incoming Damage +20%)
- Whenever Hismar gets ready to attack, a Target-shaped marker randomly appears on different parts of his body. If successfully hitting that marker with a basic X-string, this results in breaking off one of Hismar's scales that not only drops on the floor, but greatly damages his Neutralize gauge. NPC Rosa Jurgen points out that these scales contain the Berserk Dragon's power, as anyone who picks one up, will receive a temporary buff alongside a red screen tint that shows off a notice where they'll gain an increase in both attack and speed, but takes more damage as the trade-off. When the Anger abates. notice appears, that buff wears out, but can be reactivated again at anytime as long as there are scales available.
- Bullseye Roar Tremor: Upon reaching Phase 2, the map transitions into an underground section, then Hismar stands in the upper middle section as he prepares a series of five room-wide Roars that is vastly identical to Itrenok's Phase 2 ~ 3 pattern, where everyone must time their jumps within the Red AoE circles that has a safe-zone there.
- Earthquake: Hismar goes airborne and knocks everyone down, as a red circle widens underneath, then he'll fly around to dive bomb within that middle section, inflicting potential fatal damage. Immediately use
 Quick Rebound before Hismar lands.
- Room-wide Berserk Roar: Hismar will attempt to charge at party members twice, going from either left to right sides, then he'll jump towards the middle section as does a Claw Slam to knock everyone down and performs a Berserk Roar that may potentially kill anyone. Also use
 Quick Rebound immediately before the roar begins.
- Diagonal Body Slam: During this pattern, Hismar does two diagonal body slams, where he'll in a downwards path that has multiple rocks from above crumbling down. Then, he'll perform a dive bomb in the middle section.
Move Set (Bakal Raid)
Phases 1 ~ 2
- Berserk Gauge: During the beginning of Hismar's Raid fight, everyone is given their own Berserk Gauge which functions similarly to his Weak Spots pattern. But instead of picking up scales, the gauge itself will only increase whenever any of Hismar's patterns occur within yellow intersections outlined, that offers an increase towards both incoming and outgoing damage through accumulation by five stacks if anyone's standing inside those sections. Once the gauge becomes maxed out, it offers a 30% cooldown reduction buff to skills.
- Thorn Bush: At certain intervals, Hismar drops these thorn bushes above everyone's head throughout the room that shows a red circle beneath them. While these may deal minimal damage at first through contact, they'll become very dangerous if anyone has accumulated higher stacks of their Madness Gauge.
- Berserk
- Berserk Dragon Cry: He'll get into the middle section and begins roaring with a timer casting bar below, similar to his Earth Tremor pattern in Total War, instead this will actually increase everyone's Berserk Gauge leaving him vulnerable to counter-attacks while in the same room. This is an opportunity for the party fighting him to deal any type of burst damage towards Hismar and get him into at least 50% of his HP to activate Phase 2 before the bar fills up completely. There is a portal that goes right towards the next room, as it is mandatory for everyone to escape before the pattern finishes, resulting in a instant-kill.
- His Phase 2 Berserk on the other hand, is much different where he'll launch out a series of tremors underneath the ground that can be avoided through jumping over those indicators, until a green circle is highlighted, showing a safe spot to avoid his body slam which is also an instant-kill on hit. Afterwards, he'll become groggy for several seconds.
Notes & Strategy
- Hismar of the Great Dragon Trio wields powerful, yet slow and telegraphed attack patterns that can be easily avoided through proper coordination.
- If choosing not to defeat Rotund that nullifies his Sphere Effect in Total War, Hismar's damage output can be quite fatal during his fight.
- His Neutralize Gauge can be quickly broken through Weak Spots whenever he performs any of his patterns.
- Before facing Hismar in Bakal Raid, is it highly recommended for parties to collect buffs that offers an extra boost in damage towards him, but also granting immunity to the Thunderous Breath effect that contains
 Stun (Status).
 - Depending on the party's overall strength for Hismar's Total War fight, most often opt to wither down his HP during Phase 1, and then burst him down after for Phase 2 begins. So have either the Crusaders/Enchantress/Muse deploy their respective Awakenings;
 Apocalypse/
 Final Judgment,
  Crux of Victoria/
 Laus di Angelus,
  Marionette/
 Curtain Call
  On the Stage/
 Finale: Special Story and use your strongest skills.
Elemental Resist/Weakness
Abnormal Status Resist/Weakness
Quotes
Encounter
- "Kneel before me, all of you!" (Bakal Raid Encounter)
Frenzy Gauge (100%)
- "Struggle!"
- "I'll crush you!"
- "You weaklings!"
Berserk Dragon Cry
- "This is your burial site!" (Preparing to roar)
Defeat
- "My roaring voice will remain to help my king!" (Bakal Raid defeat)
Appearances
- The Machine Revolution: Bakal Raid (Boss)
- The Machine Revolution: Total War (Boss)
- Berserk Dragon's Destroyed Palace (Boss)
Trivia
Etymology
- Hismar's name could be derived from the Sanskrit Hisar (हिसार), which translate to Fortress, that could befit him for being the more physically imposing of the Great Dragons.
Gallery
Hismar portrayed in The Will of Fighters Comic
Hismar's Death
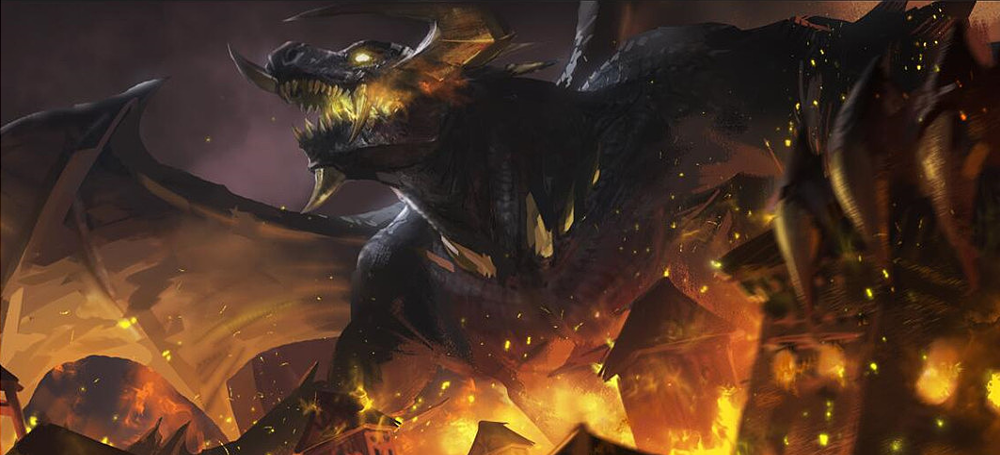
Hismar during the Machine Revolution
The Berserk Dragon
Ozma and Kazan vs Hismar
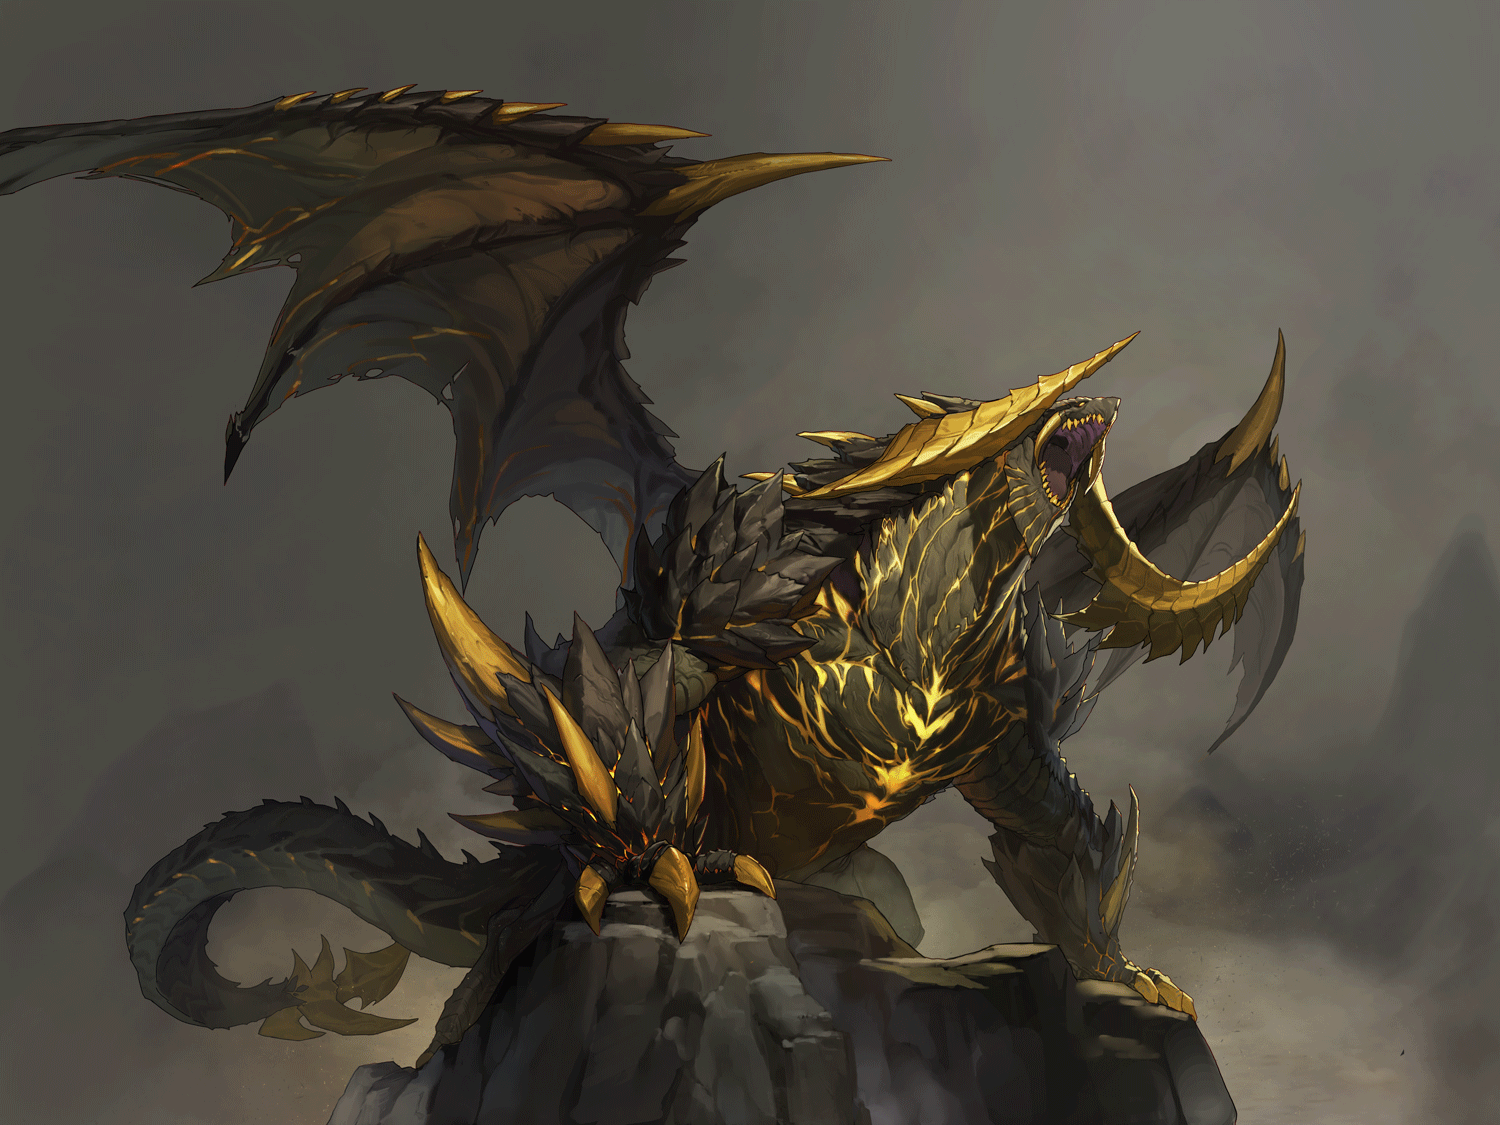
Phase 2 Form of Hismar
- Jump up ↑ https://www.dnf-universe.com/story/NlRy63OB6Yvp DFU Profile - Beserk Dragon Hismar
- Jump up ↑ https://www.dfoneople.com/news/updates/3258/The-Machine-Revolution:-Total-War/Story/Monsters The Machine Revolution: Story Monsters

