Welcome to the DFO World Wiki. With many major updates since the release of DFO, many items are missing. Visit Item Database Project to learn more.
Please remember to click "show preview" before saving the page.
Thanks for the updated logo snafuPop!

Difference between revisions of "Spectre Scenario"

From DFO World Wiki
Jump to: navigation, search
m (Tutorial)
m (Tutorial)
Line 86: Line 86:
 
<p>Hey, are you alright? Hey!</p>
 
<p>Hey, are you alright? Hey!</p>
 
}}
 
}}
 +
<hr>
 
(The elderly man carries the Young Spectre back to his campsite. The Young Spectre awakes in alarm.)
 
(The elderly man carries the Young Spectre back to his campsite. The Young Spectre awakes in alarm.)
 
{{NPCDialog|Golgolion|Mysterious Old Man|
 
{{NPCDialog|Golgolion|Mysterious Old Man|
Line 148: Line 149:
 
<p>It'll be hours before morning. You should sleep while you can. It'd be hard to get any rest in the desert once the sun is up.</p>
 
<p>It'll be hours before morning. You should sleep while you can. It'd be hard to get any rest in the desert once the sun is up.</p>
 
}}
 
}}
 +
<hr>
 
(Some time passes.)
 
(Some time passes.)
 
{{NPCDialog|Golgolion|Mysterious Old Man|
 
{{NPCDialog|Golgolion|Mysterious Old Man|

Revision as of 00:15, 21 December 2021

Details

  • Quest Type: Act Quest Icon.png
  • Level Range: 1-16
  • Area(s): Grand Flores
  • Dungeon(s):

Quests

Tutorial

Level 1
Quest Giver N/A
Dungeon Crowell Domain
Objectives None
Dungeon Dialogue

Upon entering Room A1:
(A white-haired girl clasping a sword runs and hides behind debris.)
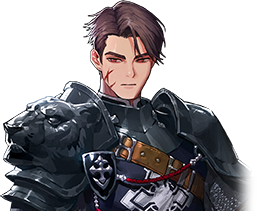
Count Mastiff.png Count Mastiff
(DIALOGUE MISSING)

(The Imperial Soldiers fan out and begin to investigate the area.)
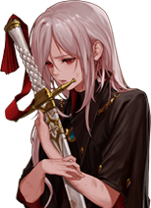
Young Spectre.png Young Spectre
(DIALOGUE MISSING)
Imperial Soldier
(DIALOGUE MISSING)

(The Young Spectre makes an attempt to flee and hits the soldier.)

Imperial Soldier
(DIALOGUE MISSING)
Count Mastiff.png Count Mastiff
(DIALOGUE MISSING)

Upon entering Room C1:

Young Spectre.png Young Spectre
(DIALOGUE MISSING)

(The Young Spectre runs toward the gate but an Imperial Knight blocks her path.)

Bale Bran.png Bale Bran
(DIALOGUE MISSING)

(The Young Spectre unsheathes her sword and raises it to defend herself.)

Young Spectre.png Young Spectre
(DIALOGUE MISSING)
Bale Bran.png Bale Bran
(DIALOGUE MISSING)

(Bale Bran swings his claymore at the Young Spectre and severs Crowell's sword in two. The Young Spectre collapses to the ground with tears.)

Young Spectre.png Young Spectre
(DIALOGUE MISSING)
Bale Bran.png Bale Bran
(DIALOGUE MISSING)

(Bale Bran walks past the weeping Young Spectre and raises his blade.)

Bale Bran.png Bale Bran
(DIALOGUE MISSING)

(Bale Bran departs.)


Upon entering Room D1:
(The Young Spectre escapes the Crowell Domain in the cover of night and ends up wandering in a desert.)

Young Spectre.png Young Spectre
(DIALOGUE MISSING)

(The Young Spectre collapses to the ground and loses consciousness. Some time later, an elderly, muscular man appears.)
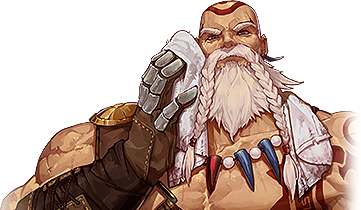
Golgolion.png Mysterious Old Man
(DIALOGUE MISSING)

(The elderly man carries the Young Spectre back to his campsite. The Young Spectre awakes in alarm.)

Golgolion.png Mysterious Old Man
(DIALOGUE MISSING)
Young Spectre.png Young Spectre
(DIALOGUE MISSING)
Golgolion.png Mysterious Old Man
(DIALOGUE MISSING)
Young Spectre.png Young Spectre
(DIALOGUE MISSING)
Golgolion.png Mysterious Old Man
(DIALOGUE MISSING)
Young Spectre.png Young Spectre
(DIALOGUE MISSING)
Golgolion.png Mysterious Old Man
(DIALOGUE MISSING)
Young Spectre.png Young Spectre
(DIALOGUE MISSING)

(The Young Spectre looks around frantically.)

Golgolion.png Mysterious Old Man
(DIALOGUE MISSING)

(The Old Man drops a broken sword to the ground.)

Golgolion.png Mysterious Old Man
(DIALOGUE MISSING)
Young Spectre.png Young Spectre
(DIALOGUE MISSING)
Golgolion.png Mysterious Old Man
(DIALOGUE MISSING)
Young Spectre.png Young Spectre
(DIALOGUE MISSING)
Golgolion.png Mysterious Old Man
(DIALOGUE MISSING)
Young Spectre.png Young Spectre
(DIALOGUE MISSING)
Golgolion.png Mysterious Old Man
(DIALOGUE MISSING)
Young Spectre.png Young Spectre
(DIALOGUE MISSING)
Golgolion.png Mysterious Old Man
(DIALOGUE MISSING)

(Some time passes.)

Golgolion.png Mysterious Old Man
(DIALOGUE MISSING)
Young Spectre.png Young Spectre
(DIALOGUE MISSING)
Golgolion.png Mysterious Old Man
(DIALOGUE MISSING)
Golgolion.png Golgoryan
(DIALOGUE MISSING)
Young Spectre.png Young Spectre
(DIALOGUE MISSING)
Golgolion.png Golgoryan
(DIALOGUE MISSING)

(Golgoryan hands the Young Spectre something.)

Young Spectre.png Young Spectre
(DIALOGUE MISSING)
Golgolion.png Golgoryan
(DIALOGUE MISSING)
Young Spectre.png Young Spectre
(DIALOGUE MISSING)
Golgolion.png Golgoryan
(DIALOGUE MISSING)
Young Spectre.png Young Spectre
(DIALOGUE MISSING)
Golgolion.png Golgoryan
(DIALOGUE MISSING)
Young Spectre.png Young Spectre
(DIALOGUE MISSING)
Golgolion.png Golgoryan
(DIALOGUE MISSING)
Dungeon Map

Nameless Village

Level 1
Quest Giver Adventurer
Dungeon Desert of Ashen
Briefing

(The Spectre arrives in a secluded village located in the desert.)

Spectre-NFace1.png Adventurer
(DIALOGUE MISSING)
Objectives Fight monsters in the desert and return to the Nameless Village.
Dungeon Dialogue Upon clearing Room B2:
Spectre-NFace1.png Adventurer
(DIALOGUE MISSING)
Upon Completion
Spectre-NFace1.png Adventurer
(DIALOGUE MISSING)
Rewards
  • Expicon.png 1,779 Exp
Dungeon Map

Visitors

Level 3
Quest Giver N/A
Briefing
Book-Face2.png Narration
(DIALOGUE MISSING)
Posia-NFace1.png War Trader Posia
(DIALOGUE MISSING)
Objectives Talk to the visitors in the Nameless Village.
  • Meet War Trader Posia: 0/1
Upon Completion
Posia-NFace1.png War Trader Posia
(DIALOGUE MISSING)
Spectre-NFace1.png Adventurer
(DIALOGUE MISSING)
Posia-NFace1.png War Trader Posia
(DIALOGUE MISSING)
Spectre-NFace1.png Adventurer
(DIALOGUE MISSING)
Posia-NFace1.png War Trader Posia
(DIALOGUE MISSING)
Spectre-NFace1.png Adventurer
(DIALOGUE MISSING)
Posia-NFace1.png War Trader Posia
(DIALOGUE MISSING)
Book-Face2.png Narration
(DIALOGUE MISSING)
Rewards
  • Expicon.png 56 Exp
  • Goldicon.png 158 Gold

Ominous Sign

Level 3
Quest Giver Adventurer
Dungeon Nameless Village (Dungeon)
Briefing
Spectre-NFace1.png Adventurer
(DIALOGUE MISSING)
Objectives Watch the merchant leaving the Nameless Village.
Dungeon Dialogue Upon entering Room A1:
Spectre-NFace1.png Adventurer
(DIALOGUE MISSING)

(The Imperial Army forces approach from the distance.)

Count Mastiff.png Count Mastiff
(DIALOGUE MISSING)
Imperial Soldier
(DIALOGUE MISSING)
Count Mastiff.png Count Mastiff
(DIALOGUE MISSING)
Spectre-NFace1.png Adventurer
(DIALOGUE MISSING)
Bale Bran.png Bale Bran
(DIALOGUE MISSING)
Count Mastiff.png Count Mastiff
(DIALOGUE MISSING)
Bale Bran.png Bale Bran
(DIALOGUE MISSING)
Spectre-NFace1.png Adventurer
(DIALOGUE MISSING)

(The Adventurer initiates her escape.)

Imperial Soldier
(DIALOGUE MISSING)
Count Mastiff.png Count Mastiff
(DIALOGUE MISSING)
Upon Completion
Spectre-NFace1.png Adventurer
(DIALOGUE MISSING)
Rewards
  • Expicon.png 3,328 Exp
  • Goldicon.png 158 Gold
Dungeon Map

Fall

Level 5
Quest Giver Count Mastiff
Dungeon Desert of Ashen
Briefing
Count Mastiff.png Count Mastiff
(DIALOGUE MISSING)
Objectives Escape the village to avoid the pursuers.
Dungeon Dialogue Upon entering Room A1:
Count Mastiff.png Count Mastiff
(DIALOGUE MISSING)
Spectre-NFace1.png Adventurer
(DIALOGUE MISSING)

Upon entering Boss Room:
(The Imperial Army corners the Adventurer. She is slowly being pushed toward the quicksand pit behind her.)

Spectre-NFace1.png Adventurer
(DIALOGUE MISSING)
Bale Bran.png Bale Bran
(DIALOGUE MISSING)
Spectre-NFace1.png Adventurer
(DIALOGUE MISSING)
Count Mastiff.png Count Mastiff
(DIALOGUE MISSING)
Spectre-NFace1.png Adventurer
(DIALOGUE MISSING)

(The Adventurer turns in desperation and jumps into the quicksand pit.)

Count Mastiff.png Count Mastiff
(DIALOGUE MISSING)

(Bale Bran approaches quicksand pit and stops to analyze it.)

Bale Bran.png Bale Bran
(DIALOGUE MISSING)
Count Mastiff.png Count Mastiff
(DIALOGUE MISSING)
Bale Bran.png Bale Bran
(DIALOGUE MISSING)
(Bale Bran departs. The rest of the Imperial Army and a frustrated Count Mastiff soon follow.)
Upon Completion
Bale Bran.png Bale Bran
(DIALOGUE MISSING)
Imperial Soldier
(DIALOGUE MISSING)
Count Mastiff.png Count Mastiff
(DIALOGUE MISSING)
Rewards
  • Expicon.png 136 Exp
  • Goldicon.png 216 Gold
Dungeon Map

My Own Path

Level 5
Quest Giver Bale Bran
Dungeon Ant Tunnel
Briefing
Bale Bran.png Bale Bran
(DIALOGUE MISSING)
Objectives Eliminate monsters in the Ant Tunnel and exit.
Dungeon Dialogue Upon entering Room A1:
Spectre-NFace1.png Adventurer
(DIALOGUE MISSING)

Upon entering Room B2:

Spectre-NFace1.png Adventurer
(DIALOGUE MISSING)

Upon entering Room C2:
(The Adventurer analyzes the surrounding monster corpses and claw marks in the terrain.)

Spectre-NFace1.png Adventurer
(DIALOGUE MISSING)

Upon clearing Room C2:
(A menacing roar is heard in the distance.)


Upon entering the Boss Room:
(A large creature charges toward the Adventurer from the shadows. The Adventurer evades the attack.)

Spectre-NFace1.png Adventurer
(DIALOGUE MISSING)
Predator Lobo
(DIALOGUE MISSING)

Upon defeating the Boss:
(The Adventurer kneels due to fatigue.)

Spectre-NFace1.png Adventurer
(DIALOGUE MISSING)
Predator Lobo
(DIALOGUE MISSING)
(Predator Lobo charges at the Adventurer. The Adventurer quickly evades the attack and slashes through the monster, and delivers a finishing slash from behind.)
Upon Completion
Spectre-NFace1.png Adventurer
(DIALOGUE MISSING)
Rewards
  • Expicon.png 8,116 Exp
  • Goldicon.png 216 Gold
Dungeon Map

End of the Ill-Fated Relationship

The Wolf of the Penitentiary

Shadows of Mountain Thunderime

The Chase Continues

The Uproar in the Confidential Area

The Adventurer's Name

A New Encounter, A New Beginning

Navigation

[hide]Quests — Origin
Act Quest Icon.png Gran Flores (LV 1) | Sky Castle (LV 17) | Behemoth (LV 24) | Aphelia (LV 30) | Underfoot (LV 36) | Mount Thunderime (LV 40) | North Myre (LV 46) | Mirror Arad (LV 50) | Antwer Canyon (LV 63) | Oceanic Express (LV 71) | Time Gate (LV 75) | Power Station (LV 81) | Fire-Eater Anton (LV 84) | Castle of the Dead (LV 85) | Constructor Luke (LV 88) | Harlem (LV 90) | Nighttime Skyscraper (LV 94) | Pandemonium Meeting (LV 95) | Pandemonium War (LV 95) | Empyrean War Chronicle I (LV 95) | Empyrean War Chronicle II (LV 95) | Empyrean War Chronicle (LV 95) | Black Shrine (LV 97) | The Oculus (LV 99) | Abysmal Sky Tower (LV 100) | The Exile Mountains (LV 100) | The Night of Revelation (LV 100) | Black Purgatory (LV 100) | Dark Side (LV 100) | War of the Saints (LV 100) | Dimensional Storm (LV 102) | Noblesse Code I (LV 103) | Noblesse Code II (LV 104) | Destroyed Castle of the Dead (LV 106) | Eternal Flame Lab I (LV 108) | Eternal Flame Lab II (LV 109) | The Meister's Laboratory (LV 110) | Ispins, the Usurped Lands (LV 110) The Machine Revolution (LV 110)

Spectre Scenario (LV 1) | Western Lawless District (LV 1)

Episode Quest Icon.png Fiend War (LV 94) | Soldoros's Decision (LV 95) | Pit of Incarceration (LV 95) | Guide of Wisdom (LV 96) | Stormy Route (LV 96) | Sanctum in the Abyss (LV 100) | Dark Dimension (LV 100) | Aeterna (LV 100) | Watcher in the Rift (LV 100) | Cursed Ruby (LV 100)
Hidden Quest Icon.png Karakas' Curiosity | Empyrean Revolt 1 (LV 90) | Empyrean Revolt 2 (LV 90) | Sky Nest (LV 94) | Apostle Crusade (LV 100) | A Priestess from the Empire (LV 100) | North Myre Disappearances (LV 100)
Side Quest Icon.png Valley of the Fallen Souls | Altar of Ascension | Anton Subjugation | Invitation to the Training Center | Forgotten Land | Melvin's Shame | Halidom Weapon | Hell Party | Suju Arena | Kiri's Epic Crafting Machine | Melvin's Shame | Mt. Kulun | Tower of Dazzlement | Tower of Anguish | Luke Subjugation | Pandemonium Rift | Imperial Arena | Dimensional Universe | Tayberrs | Beast Dungeon | Fiend War | Disaster Sector | Assault Mode | Let's Retexturize | Dawning Crevice | Spirit Heaven | Operation: Hope | Talisman | Ceberin | Laura | Cursed Ruby | Ghent Palace | Roschest | Sirocco Raid | Sanctum of Resurrection | Missing Lucille | Storm's Wrath
Adventure Quest Icon.png Empyrean War Chronicles I | Empyrean War Chronicles II | Genesis
Mission Quest Icon.png N/A
Daily Quest Icon.png N/A
Limited Quest Icon.png N/A
EXP Quest Icon.png N/A
Character Quest Icon.png N/A
Advancement Quest Icon.png
Awakening Quest Icon.png
True Awakening 1 | True Awakening 2
Profession Quest Icon.png N/A
Evolution Quest Icon.png N/A