Welcome to the DFO World Wiki. With many major updates since the release of DFO, many items are missing. Visit Item Database Project to learn more.
Please remember to click "show preview" before saving the page.
Thanks for the updated logo snafuPop!
Difference between revisions of "User:HellMuT"
m (→6) |
m (→6) |
||
| Line 251: | Line 251: | ||
|- | |- | ||
| − | ! colspan="3" style="background:#a0c6e3;" |[[Image:Icon Octopus Hunter.jpg|28px|left]] Octopus Hunter([[Priest]) | + | ! colspan="3" style="background:#a0c6e3;" |[[Image:Icon Octopus Hunter.jpg|28px|left]] Octopus Hunter([[Priest]]) |
|- | |- | ||
| align="center" rowspan="2" | [[Image:Octopus Hunter.jpg]] | | align="center" rowspan="2" | [[Image:Octopus Hunter.jpg]] | ||
| Line 264: | Line 264: | ||
|- | |- | ||
| − | ! colspan="3" style="background:#a0c6e3;" |[[Image:Icon Necromancer Deathword.jpg|28px|left]] Necromancer Deathword([[Slayer]) | + | ! colspan="3" style="background:#a0c6e3;" |[[Image:Icon Necromancer Deathword.jpg|28px|left]] Necromancer Deathword([[Slayer]]) |
|- | |- | ||
| align="center" rowspan="2" | [[Image:Necromancer Deathword.jpg]] | | align="center" rowspan="2" | [[Image:Necromancer Deathword.jpg]] | ||
| Line 277: | Line 277: | ||
|- | |- | ||
| − | ! colspan="3" style="background:#a0c6e3;" |[[Image:Icon Hughton.jpg|28px|left]] Hughton, the King of Destruction ([[Monk]) | + | ! colspan="3" style="background:#a0c6e3;" |[[Image:Icon Hughton.jpg|28px|left]] Hughton, the King of Destruction ([[Monk]]) |
|- | |- | ||
| align="center" rowspan="2" | [[Image:Hughton.jpg]] | | align="center" rowspan="2" | [[Image:Hughton.jpg]] | ||
| Line 290: | Line 290: | ||
|- | |- | ||
| − | ! colspan="3" style="background:#a0c6e3;" |[[Image:Icon Sewer Queen Faris.jpg|28px|left]] Sewer Queen Faris ([[Brawler]) | + | ! colspan="3" style="background:#a0c6e3;" |[[Image:Icon Sewer Queen Faris.jpg|28px|left]] Sewer Queen Faris ([[Brawler]]) |
|- | |- | ||
| align="center" rowspan="2" | [[Image:Sewer Queen Faris.jpg]] | | align="center" rowspan="2" | [[Image:Sewer Queen Faris.jpg]] | ||
| Line 303: | Line 303: | ||
|- | |- | ||
| − | ! colspan="3" style="background:#a0c6e3;" |[[Image:Icon .jpg|28px|left]] Name ([[Class]) | + | ! colspan="3" style="background:#a0c6e3;" |[[Image:Icon .jpg|28px|left]] Name ([[Class]]) |
|- | |- | ||
| align="center" rowspan="2" | [[Image:.jpg]] | | align="center" rowspan="2" | [[Image:.jpg]] | ||
Revision as of 03:59, 18 December 2009
Sexy ass nigga
Note to self: Take Screenshots of ingame weapons for better translations.
Contents
Things to Do
- Add data to Grappler page (maybe other fighter pages)
- Skill Point quest table
- Randomly do weapons
Weapon Table
| Icon | Item Name | Level | Base Stats | Stat Bonus | Skill Bonus | Other Bonus |
|---|---|---|---|---|---|---|
| — | Purple | # | P.Atk ~
M.Atk ~ |
Str +~ | — | — |
| — | Pink | # | P.Atk ~
M.Atk ~ |
Str +~ | — | — |
| — | Orange | # | P.Atk ~
M.Atk ~ |
Str +~ | — | — |
| — | Item w/ description | # | P.Atk ~
M.Atk ~ |
Str +~ | — | — |
| Description | ||||||
APC
1
| Kuran's Nemesis Jahilde | |
|---|---|
| Class | 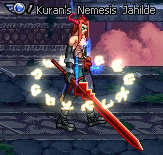
|
| Asura | |
| Location | |
| Purgatorium: Room A3 | |
| Notes | |
| Spams Neutral Wave Sword and occasionally use Wave Radiation. | |
| Treasure Hunter Jakarta | |
| Class | 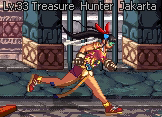
|
| Brawler | |
| Location | |
| Silver Night: Room D3 | |
| Notes | |
| Will attempt to Double Throw Split Disks, and uses Explosive Hook often. Occasionally uses Apply Poison. | |
2
| Kuran's Nemesis Jahilde | ||
|---|---|---|
| Location | Class | 
|
| Purgatorium: Room A3 | Asura | |
| Notes | ||
| Spams Neutral Wave Sword and occasionally use Wave Radiation. | ||
3
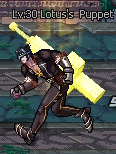
| Lotus's Puppet | ||
|---|---|---|
|
Class | Location |
| Crusader | Outer Temple Walls: Room C5 | |
| Notes | ||
| Buffs self with Strike, and goes on the offensive with Giant Weapon Launcher and Blades of Purity. | ||
4
| Lotus's Puppet | ||
|---|---|---|

|
Class | |
| Crusader | ||
| Location | ||
| Outer Temple Walls: Room C5 | ||
| Notes | ||
| Buffs self with Strike, and goes on the offensive with Giant Weapon Launcher and Blades of Purity. | ||
5
| Kuran's Nemesis Jahilde | ||
|---|---|---|

|
Class | Location |
| Asura | Purgatorium: Room A3 | |
| Notes | ||
| Spams Neutral Wave Sword and occasionally use Wave Radiation. | ||
6
| Kuran's Nemesis Jahilde (Asura) | ||
|---|---|---|

|
Location | |
| Purgatorium: Room A3 | ||
| Notes | ||
| Spams Neutral Wave Sword and occasionally uses Wave Radiation. | ||
| Lotus's Puppet (Crusader) | ||

|
Location | |
| Outer Temple Walls: Room C5 | ||
| Notes | ||
| Buffs self with Strike, and goes on the offensive with Giant Weapon Launcher and Blades of Purity. | ||
| Treasure Hunter Jakarta (Brawler) | ||

|
Location | |
| Silver Night: Room D3 | ||
| Notes | ||
| Will attempt to Double Throw Split Disks, and uses Explosive Hook often. Occasionally uses Apply Poison. Spams Muse's Uppercut after being knocked down. | ||
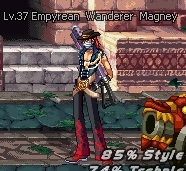
| Empyrean Wanderer Magney (Gunner) | ||
|
Location | |
| Second Spine: Room D1 | ||
| Notes | ||
| Uses BBQ and summons RX-78 Land Runners | ||
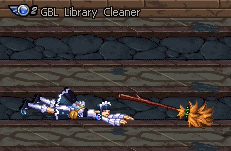
| GBL Library Cleaner (Witch) | ||
|
Location | |
| GBL Arad Branch: Room A1, D1, C3 | ||
| Notes | ||
| Uses basic melee attack and air dashes around. | ||
| Frostbit Xile (Gunner) | ||
| File:Frostbite Xile.jpg | Location | |
| GBL Laboratory: | ||
| Notes | ||
| Uses custom Ice Wave attack. | ||
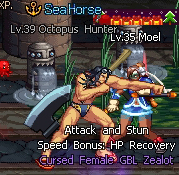
| Octopus Hunter(Priest) | ||
|
Location | |
| GBL Laboratory: | ||
| Notes | ||
| Uses Furious Grab | ||
| Necromancer Deathword(Slayer) | ||
| File:Necromancer Deathword.jpg | Location | |
| GBL Hatchery: | ||
| Notes | ||
| Uses custom attack | ||
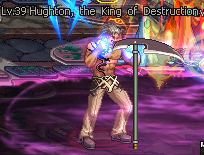
| Hughton, the King of Destruction (Monk) | ||
|
Location | |
| GBL Hatchery: Boss Room | ||
| Notes | ||
| Just Rapes | ||
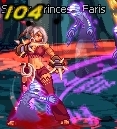
| Sewer Queen Faris (Brawler) | ||
|
Location | |
| Spider's Lair: | ||
| Notes | ||
| Has a vicious Raging Vulcan attack that will OHKO most classes. | ||
| Name (Class) | ||
| File:.jpg | Location | |
| Map: Boss Room | ||
| Notes | ||
| - | ||
